Hello! My name is Rachel, I’m 32 years old and I have been cooking up a storm since I was a teenager. I regularly cook for my daughter, although because it’s just the two of us at home, I seem to cook the same things over and over again. Although we do not have any food allergies, my daughter does have a number of food preferences that I have to work around – mostly vegetables (what a surprise ;)) I love when I get the opportunity to cook for guests, especially when I can make a holiday meal and recreate some of the things my mum made when I was growing up. We ate very traditional British food and we always ate together at the kitchen table. I think this has given me an appreciation for simple meals made with real ingredients. Because of this I wouldn’t exactly call myself a “foodie” – I am more interested in making wholesome and homemade meals for people to gather around and be nourished by, than keeping up with food trends. In fact, I am sooo not into food trends that some people might consider me old-fashioned. I LOVE canning foods and learning about how people fed their families and stored their food when they didn’t have the conveniences of grocery stores and refrigeration. I also am curious about regional Canadian cuisine and would like to try more traditional foods from across the country. My favourite chef and television show host is Canadian Michael Smith. To me, his food is not pretentious and is designed for families and I have never been disappointed by any of his recipes. I also enjoy reading Angela Liddon’s blog “Oh She Glows” because she is another great example of a person who makes foods with family in mind and uses whole food ingredients. I’m really looking forward to beginning a food blog of my own and giving myself an excuse to try out new recipes and share my passion for “old-fashioned” foods with more people.
When I first moved to British Columbia, my mom and I attended a session at VIU’s Shq’athut where we learned about First Nations protocols and we were also able to enjoy the most amazing soup and bannock I have ever had. Before this event, I had always thought of bannock as something you wrapped around a stick and cooked over a flame, or else a thin, flat, pancake-type bread that didn’t have any rise to it. The bannock we had at VIU was more like a cornbread texture – thick and fluffy and absolutely delicious with butter.
I scoured websites for anything that looked remotely like this but it wasn’t easy. I also wanted to include something with blueberries because from my research and the materials we read in class, blueberries in this region have always been plentiful and used for a variety of dishes. It was a little tricky, but I was able to recreate something that I hope does traditional bannock some justice.
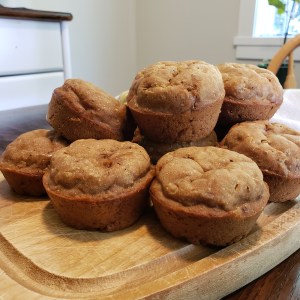
I think I have mentioned before that I feel that cooking is something that brings people together and creates community. I know that bread has sustained people through very difficult periods in human history and that every culture has its own version of bread. I realize that bannock isn’t the most inspired or complicated dish, but it is one that I find meaningful. Below is my first attempt at making bannock, which I paired with a homemade blueberry sauce.
Recipe for Bannock, by Canadian Living and a Simple Blueberry Sauce Topping
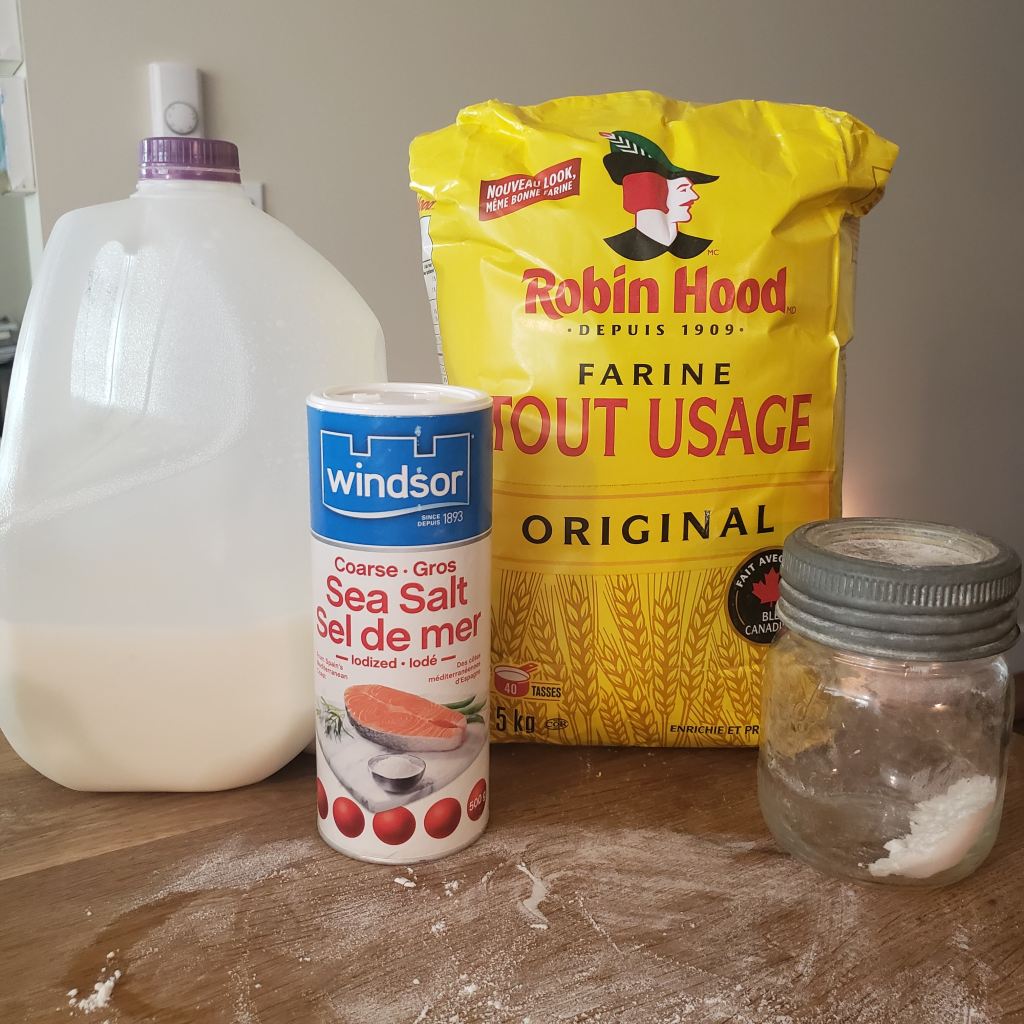
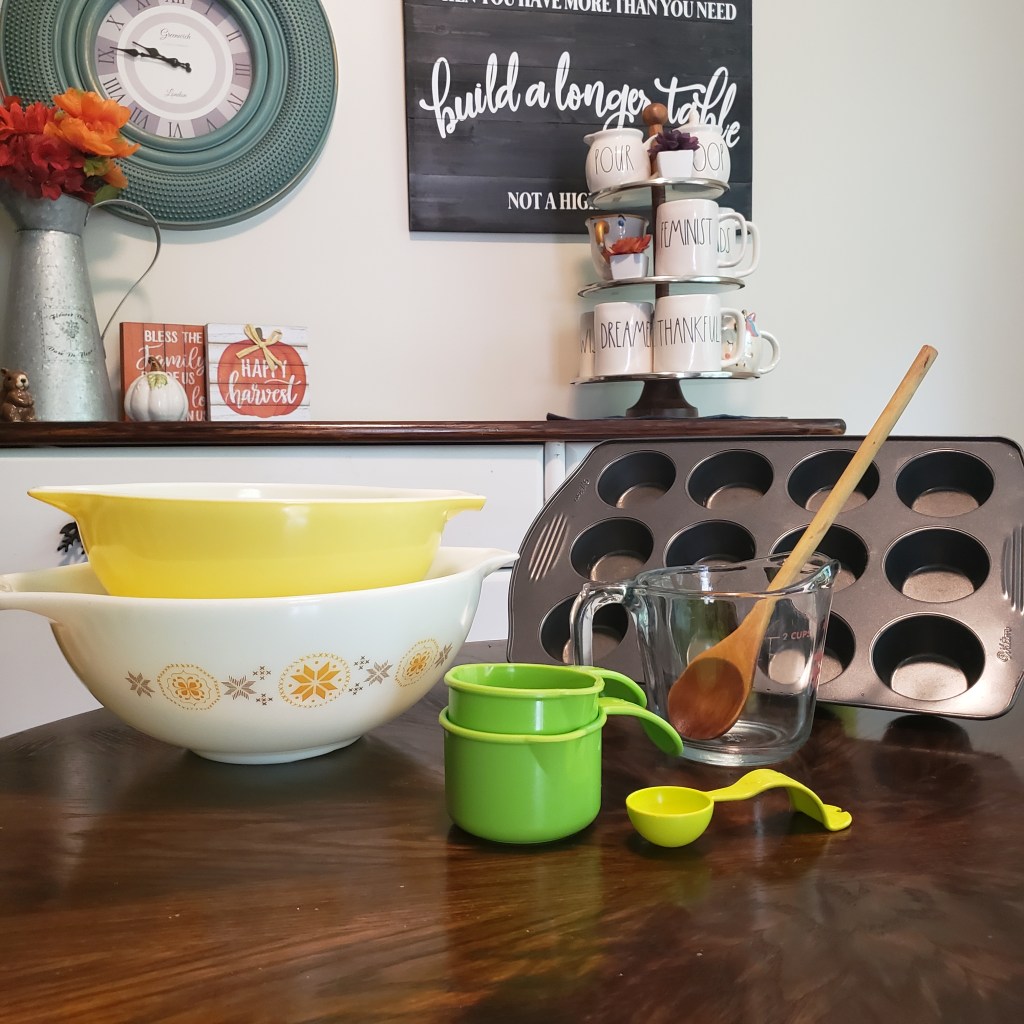
Ingredients
2 cups all-purpose flour
1 T baking powder
1/2 t salt
1/2 cup milk
1/2 cup water
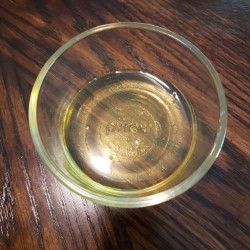
Vegetable oil to cover the bottom of a cast-iron frying pan by 1/2 inch
You will also need:
Medium mixing bowl
Fork
Measuring cup and spoons
Cast-iron frying pan
A spatula to flip the bread
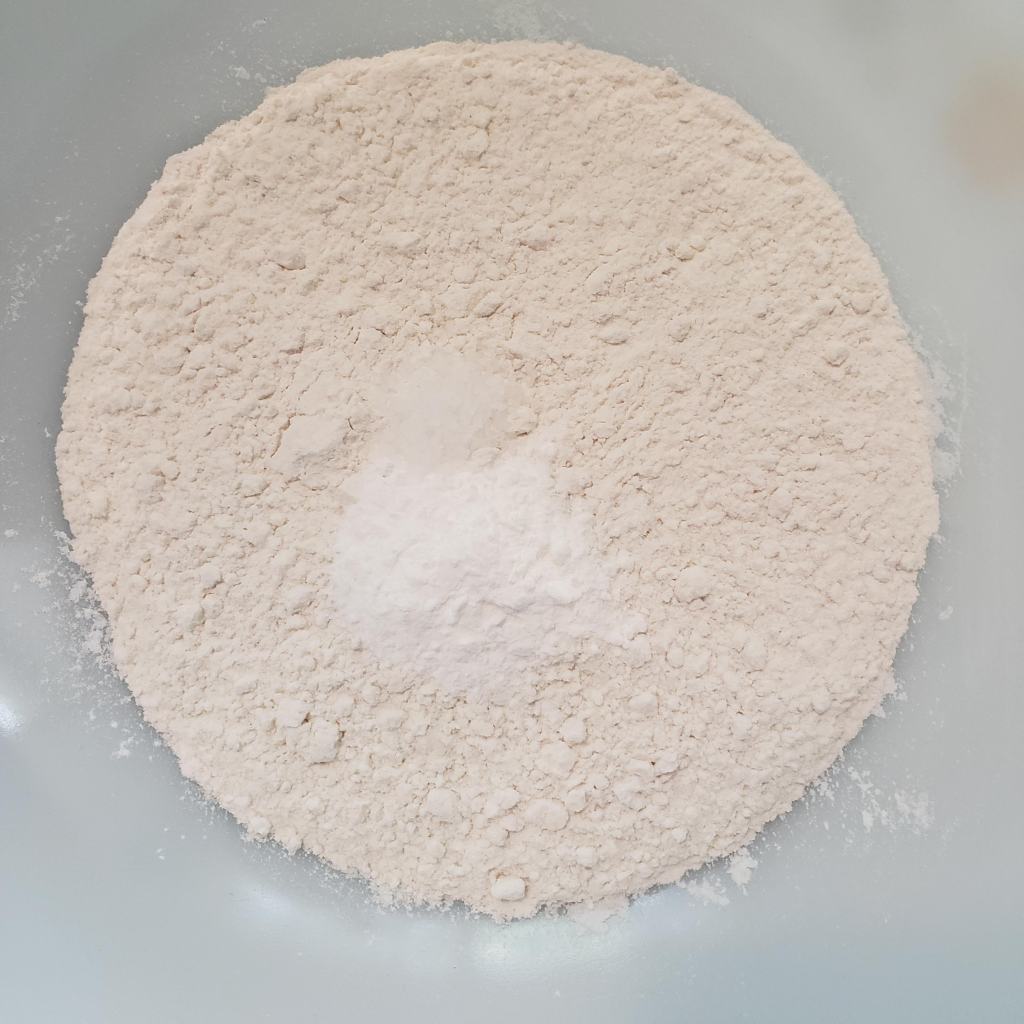
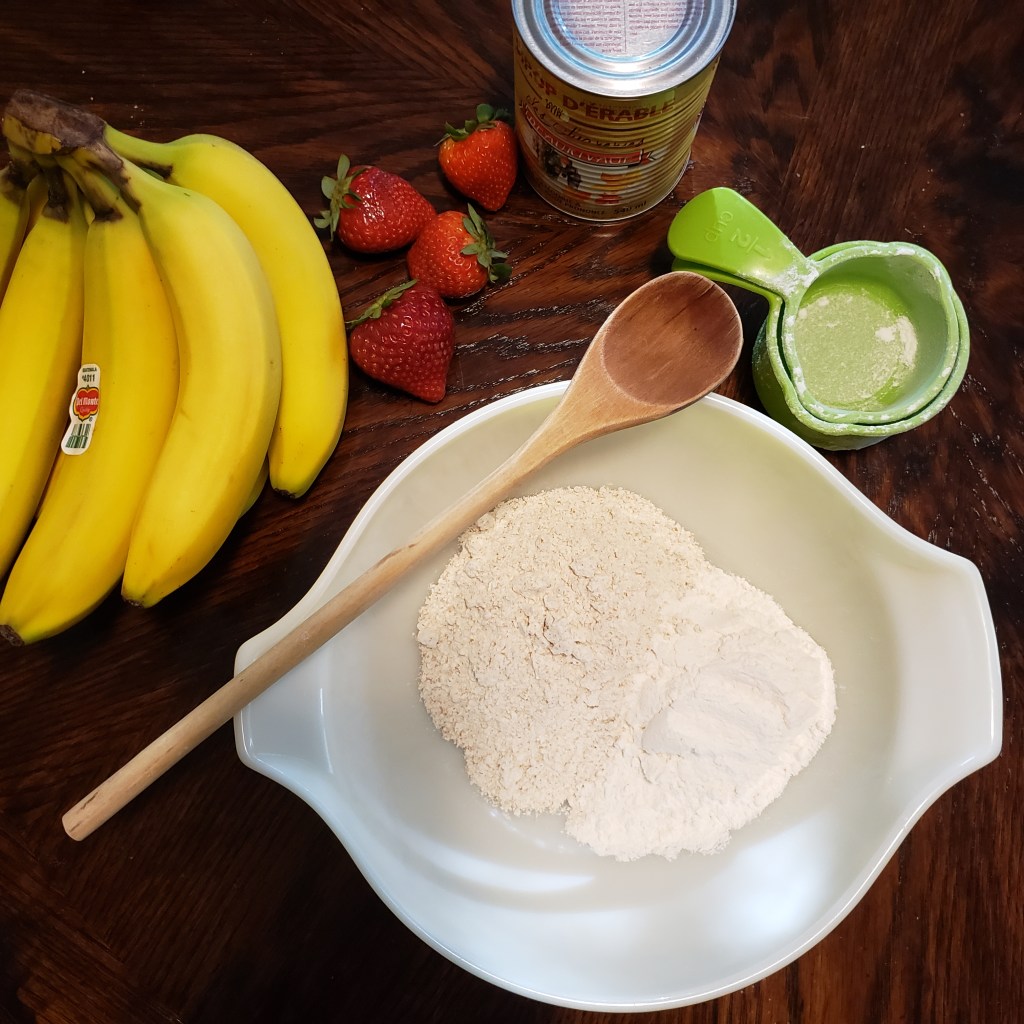
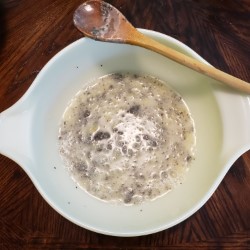
Flour, salt, baking powder
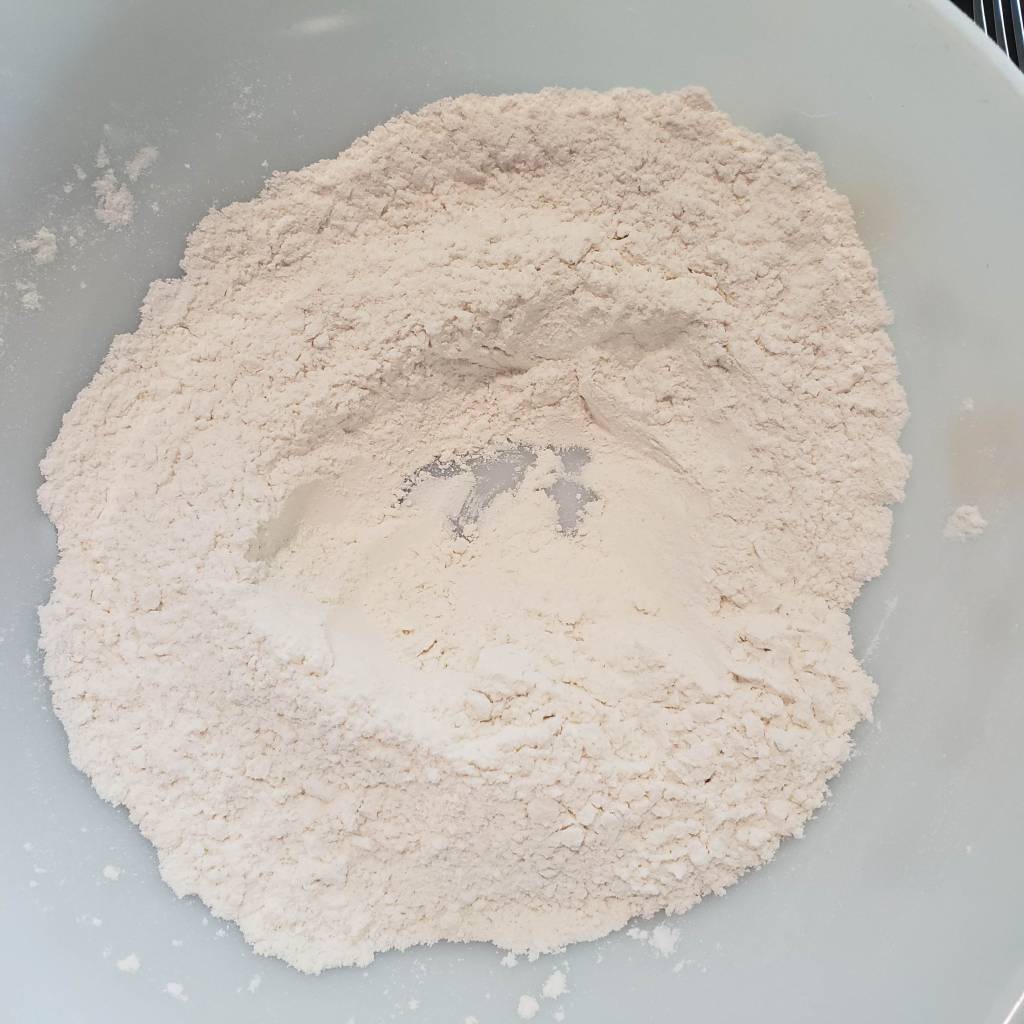
Ingredients blended, well created
Add liquid ingredients
Sticky dough
Method:
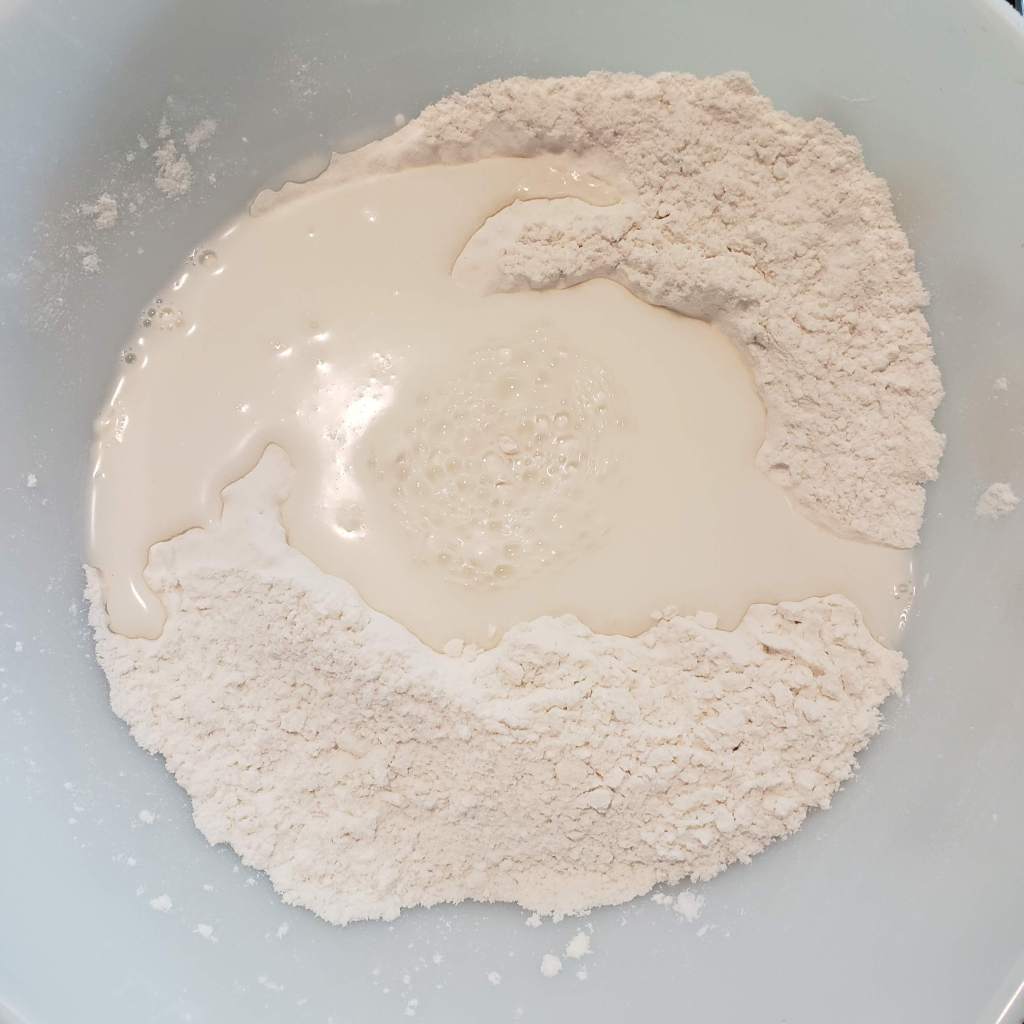
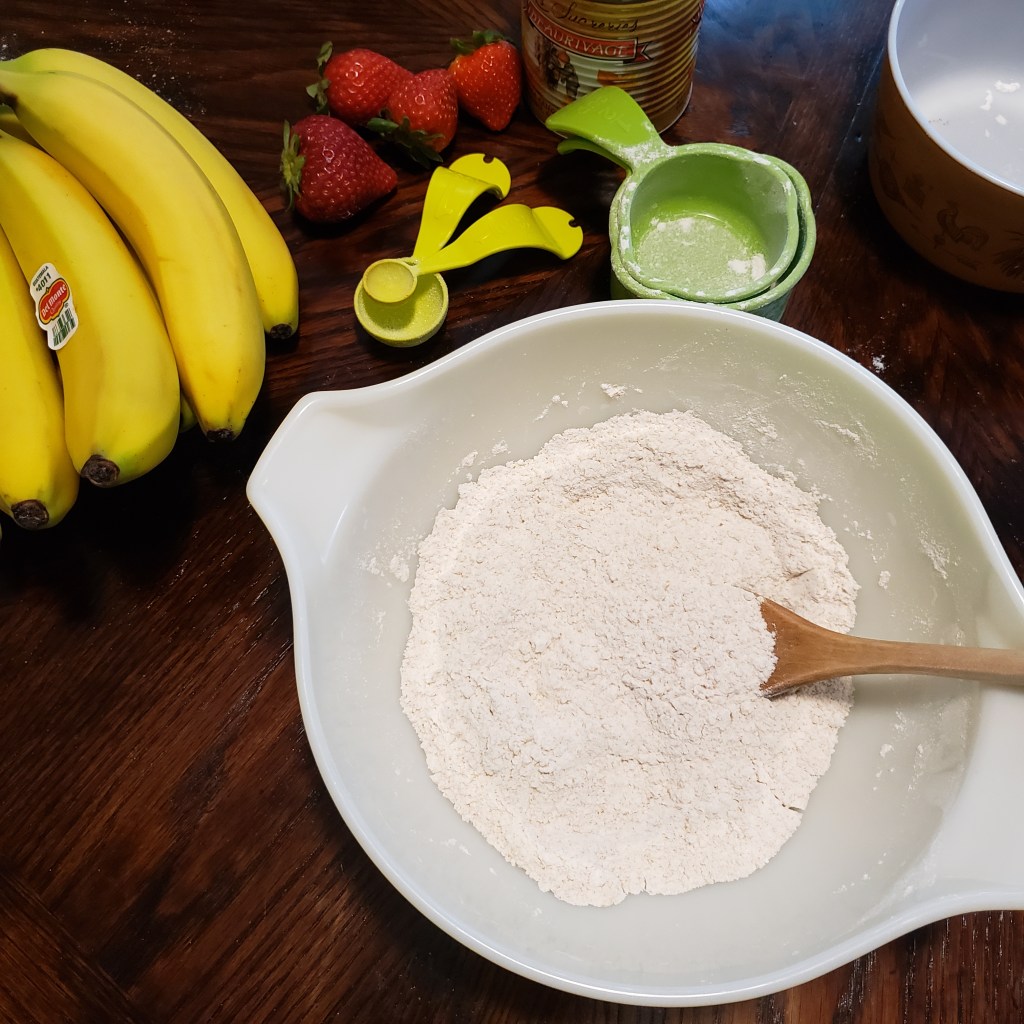
In a medium sized bowl, add flour, baking powder and salt. Using a fork, stir to combine.
Create a well in the centre.
Pour the milk and water into the well.
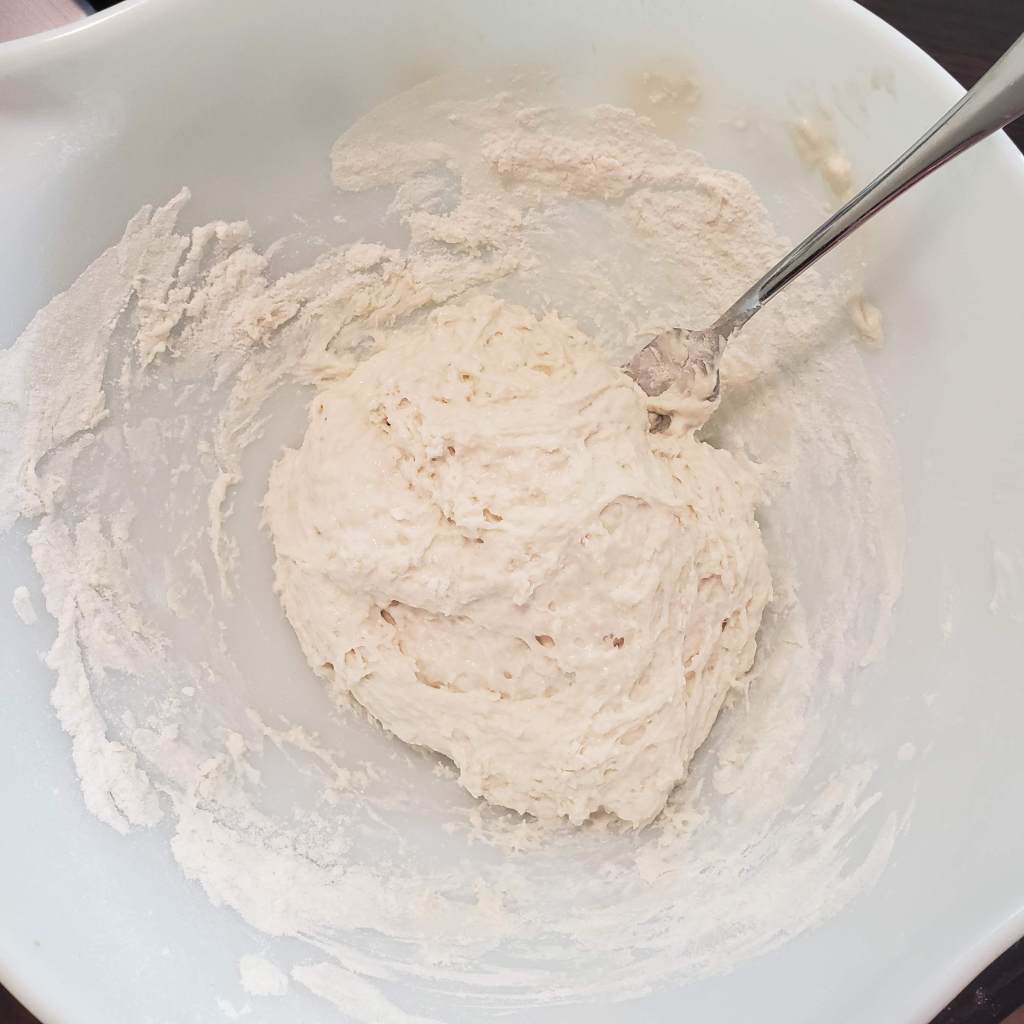
Using a fork, stir to combine. The dough will be quite sticky.
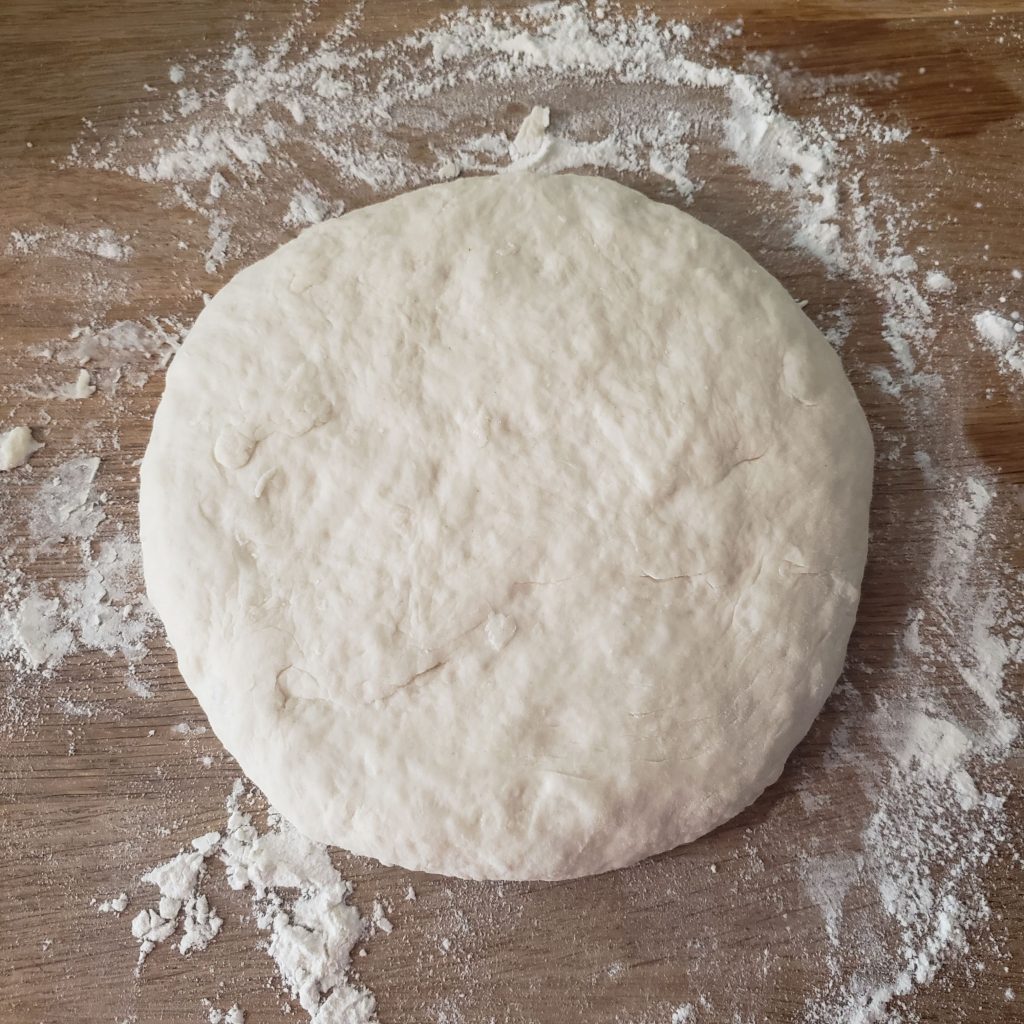
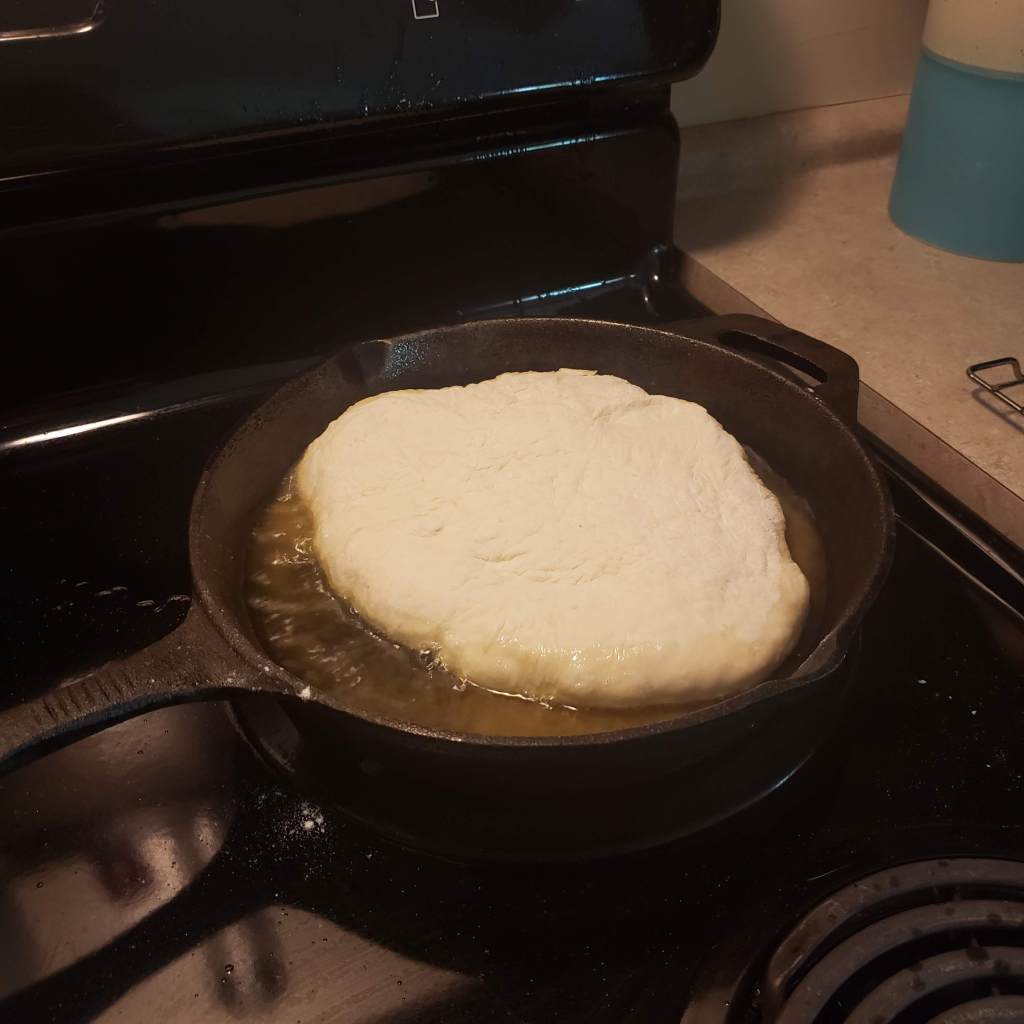
5. On a well-floured surface, knead and shape dough briefly until it forms a disc, approximately 20 cm across.
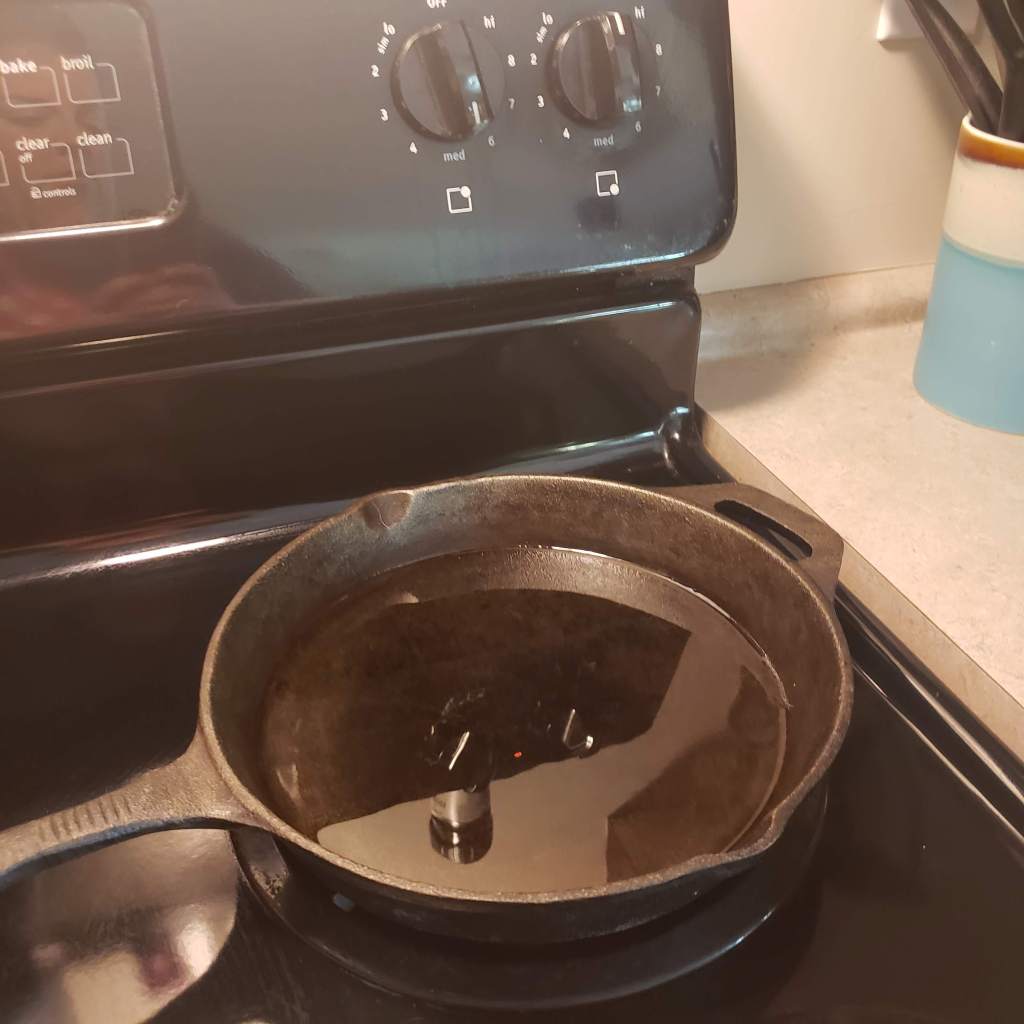
This was the point in the recipe that I started to struggle. I have never – not once – fried something in anything more than a drizzle of oil or butter because I am very afraid of splattering hot oil on myself or starting a fire.
Oil heated over medium
Lots of bubbles!
Beautiful colour and rise
6.
6. Heat 1/2 in of vegetable oil over medium heat in a cast-iron skillet.
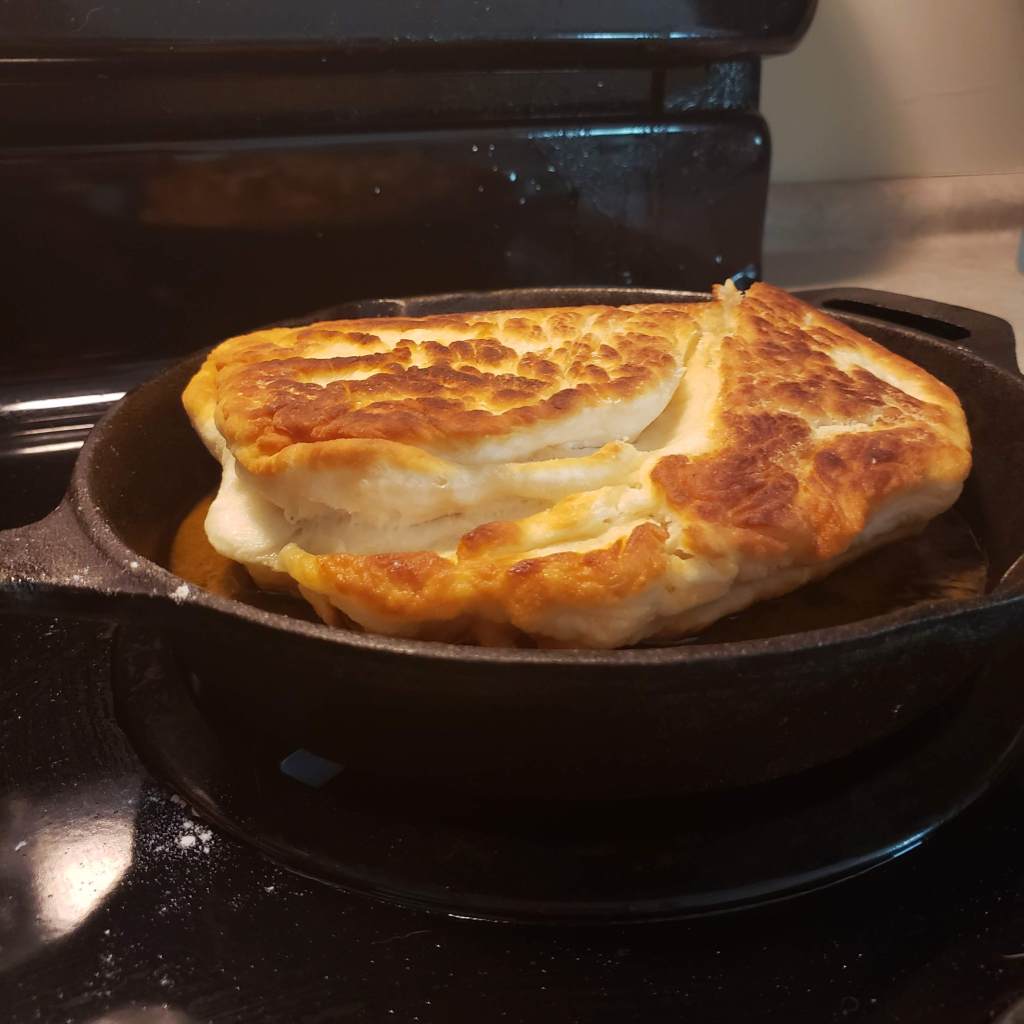
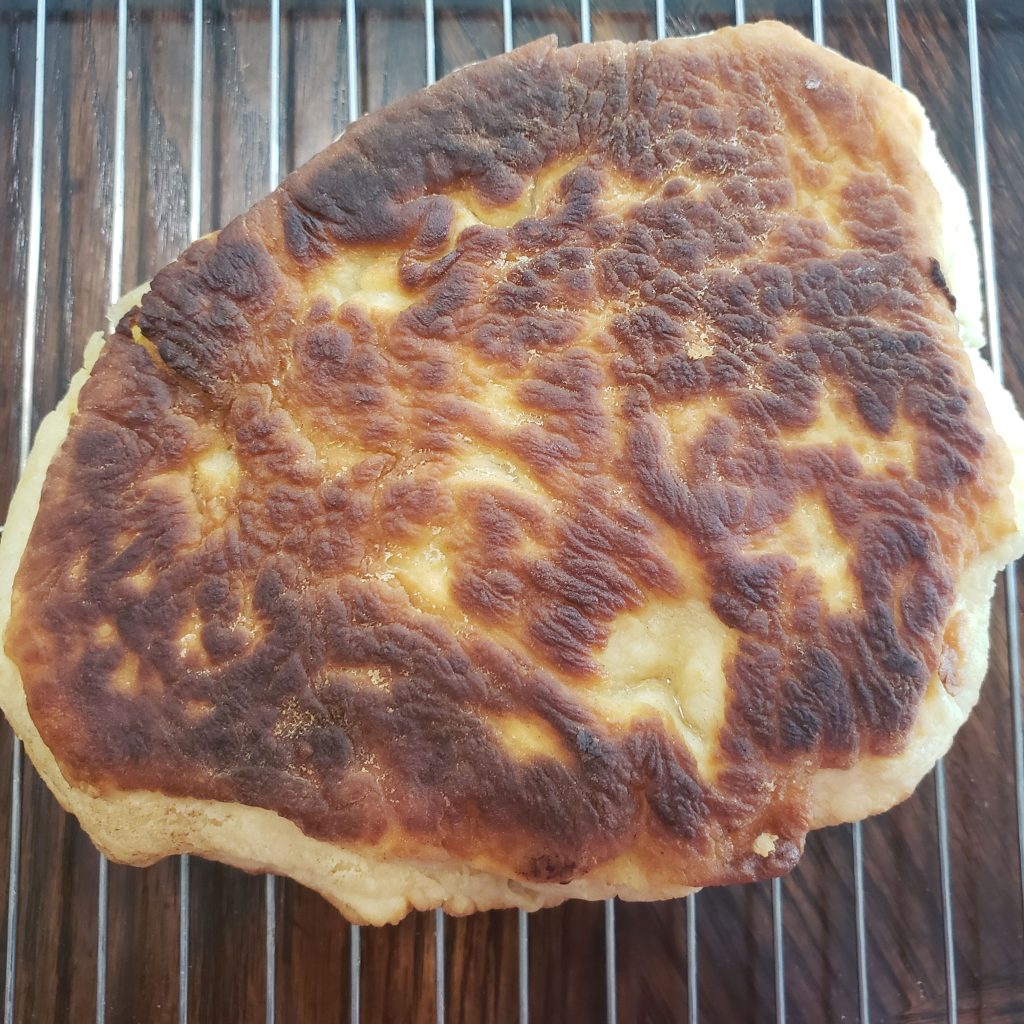
7. Carefully place the disc of dough into the oil and according to the recipe, flip the bread after approximately 8 minutes. You can see in the last picture above how much the dough has risen.
However, my dough was still raw after the indicated cooking time.
I think it’s likely that I had the heat on too low because I was nervous about frying with so much oil. I think that if someone followed the recipe directions exactly they would be fine. Below I have included how I ended up fixing my mistake.
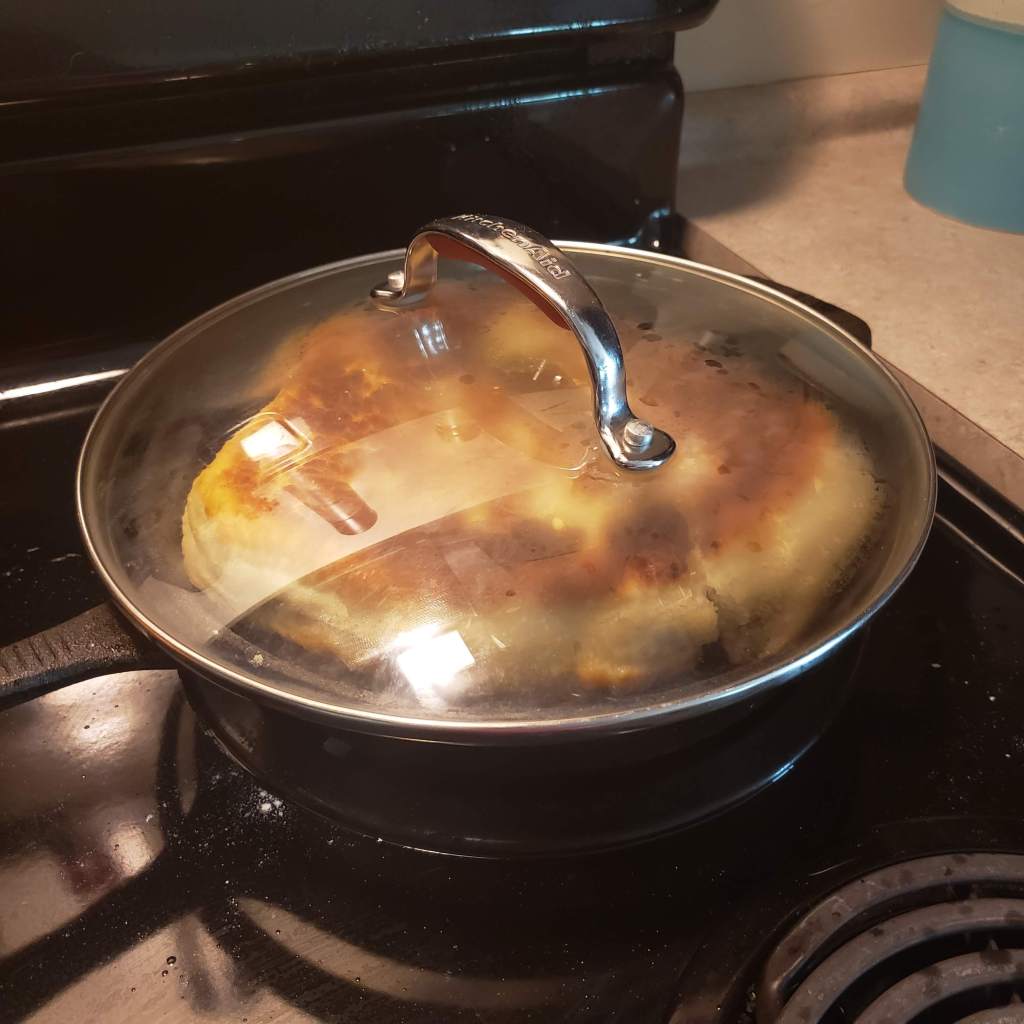
Trying again with lid
Final result
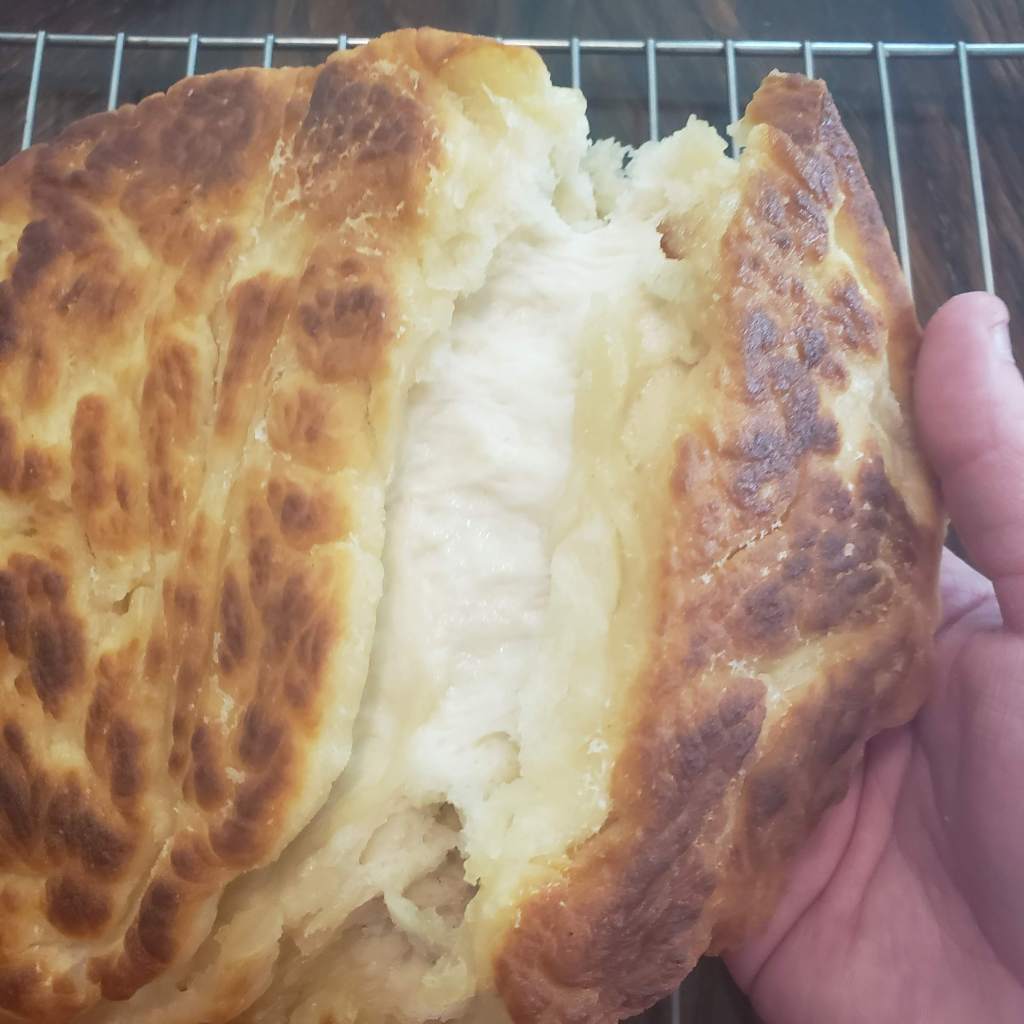
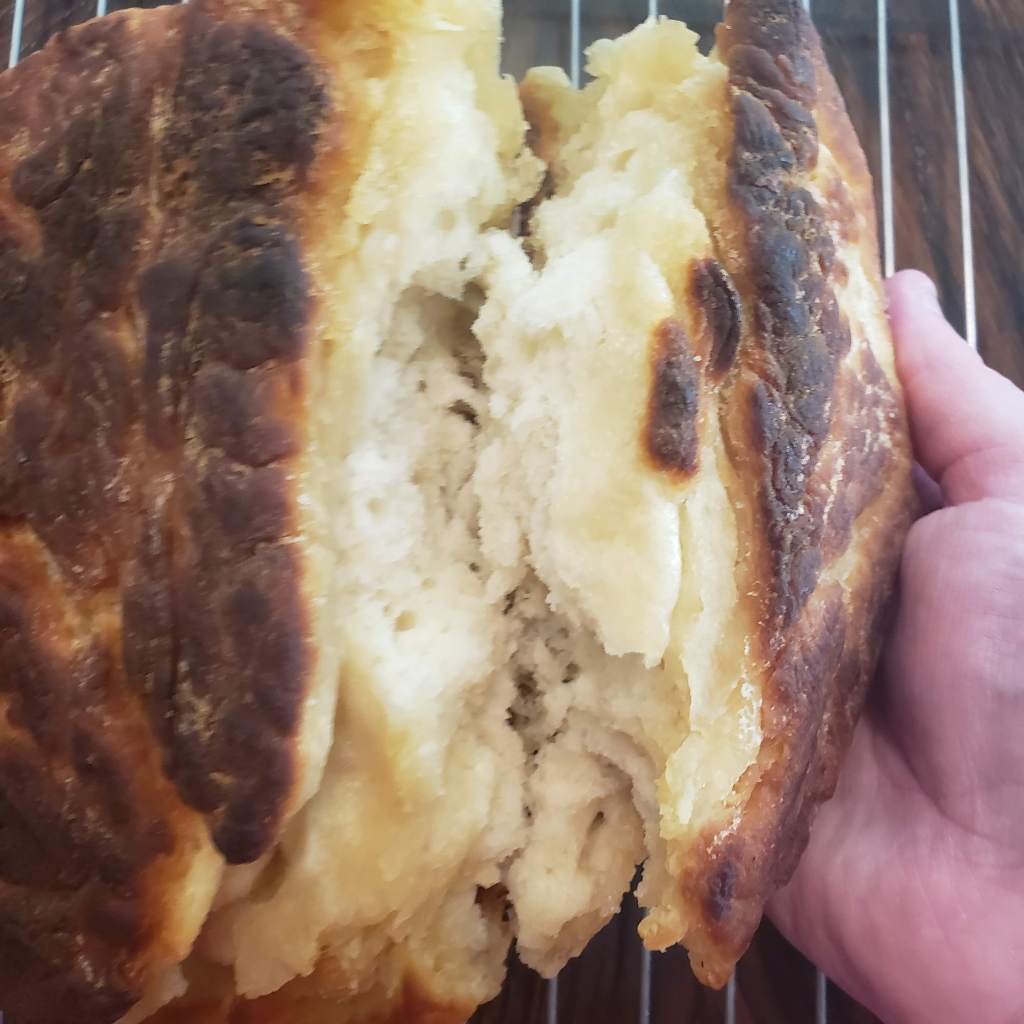
Fully cooked
I decided to keep cooking the bread but this time, I put a lid over the bread to hopefully get the inside to cook. I continued frying for about another 3 minutes on each side, and when I removed it from the pan, the bread was darker and as you can see, cooked all the way through.
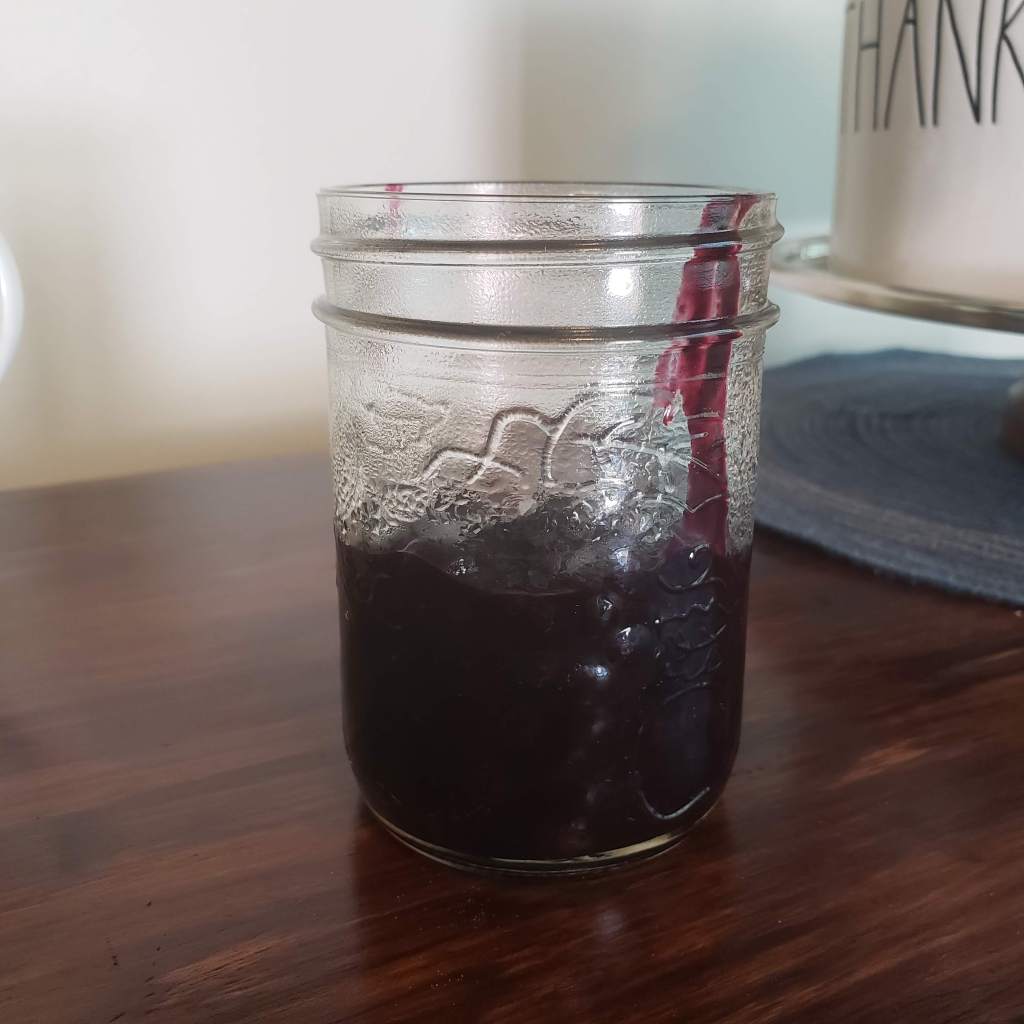
Easy Blueberry Sauce
Ingredients and Tools:
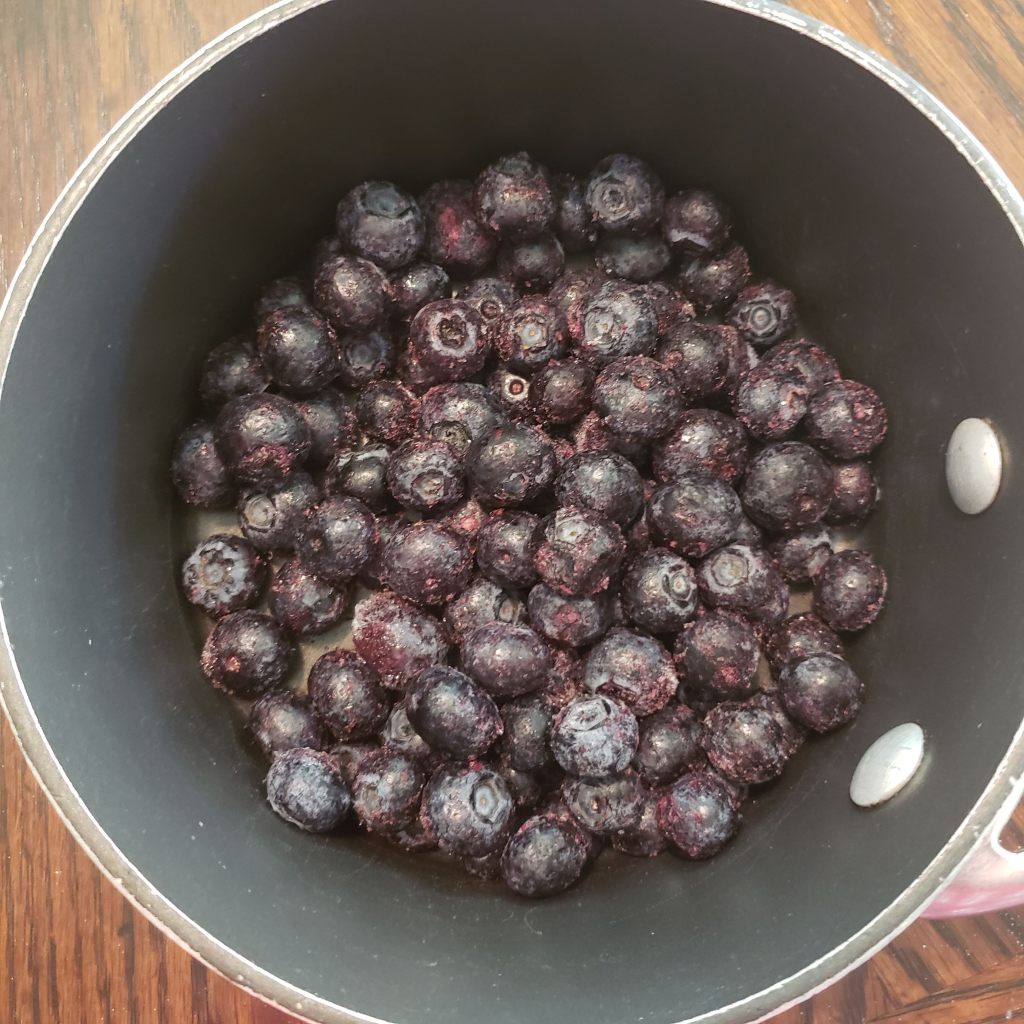
1 1/2 cups blueberries (I used frozen)
Water
A small saucepan
A wooden or plastic long-handled spoon
Method:
Add blueberries to saucepan over medium heat.
Add a splash of water – maybe 2 or 3 tablespoons to begin, you can add more if needed.
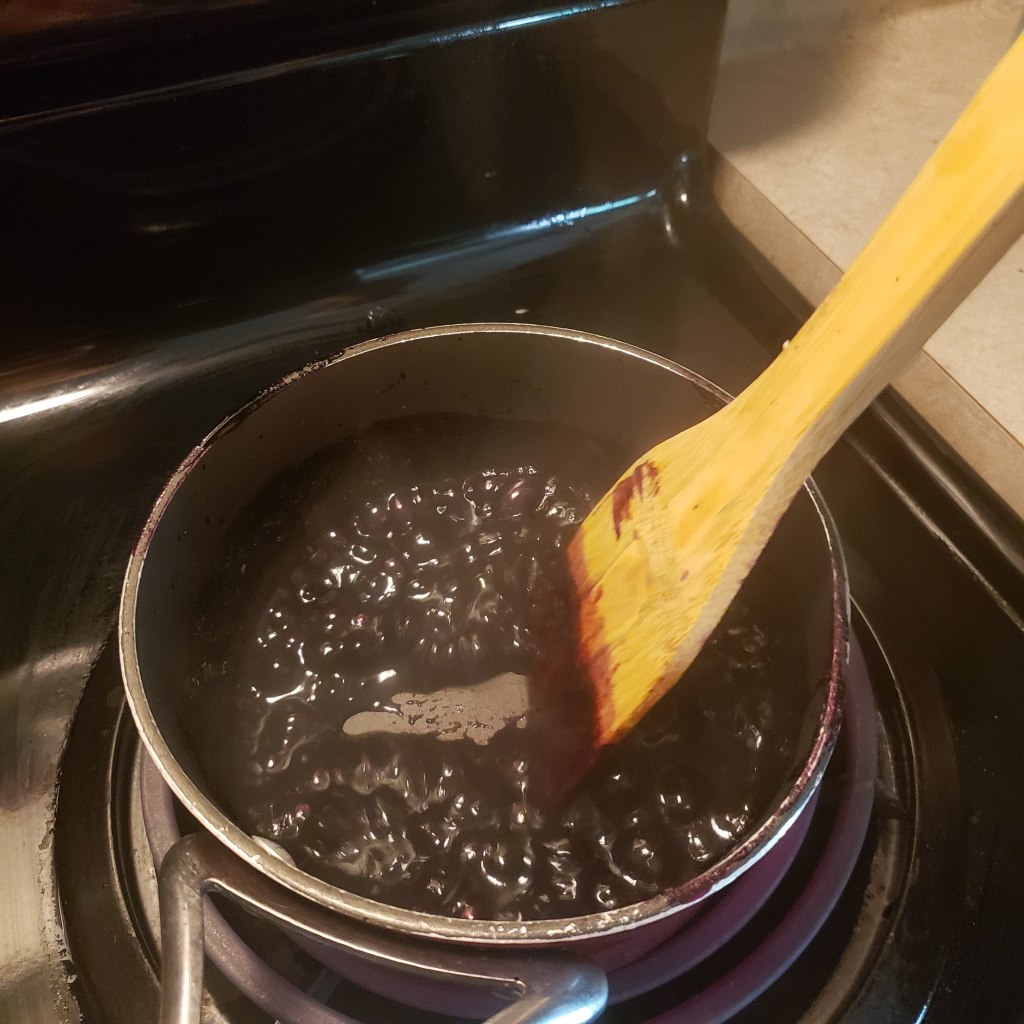
Cook over medium heat, stirring occasionally, until blueberries begin to release their juices.
As the blueberries cook down, the juice will thicken. You will begin to see that the fruit is thick enough to stay divided when you run the spoon across the bottom of the pan, like in the 2nd picture above.
5. Continue cooking your fruit down until you reach your desired consistency. Cooking time will vary depending on the moisture content of your fruit. Mine took about 20-25 minutes and I ended up with about 1/2 cup of sauce.
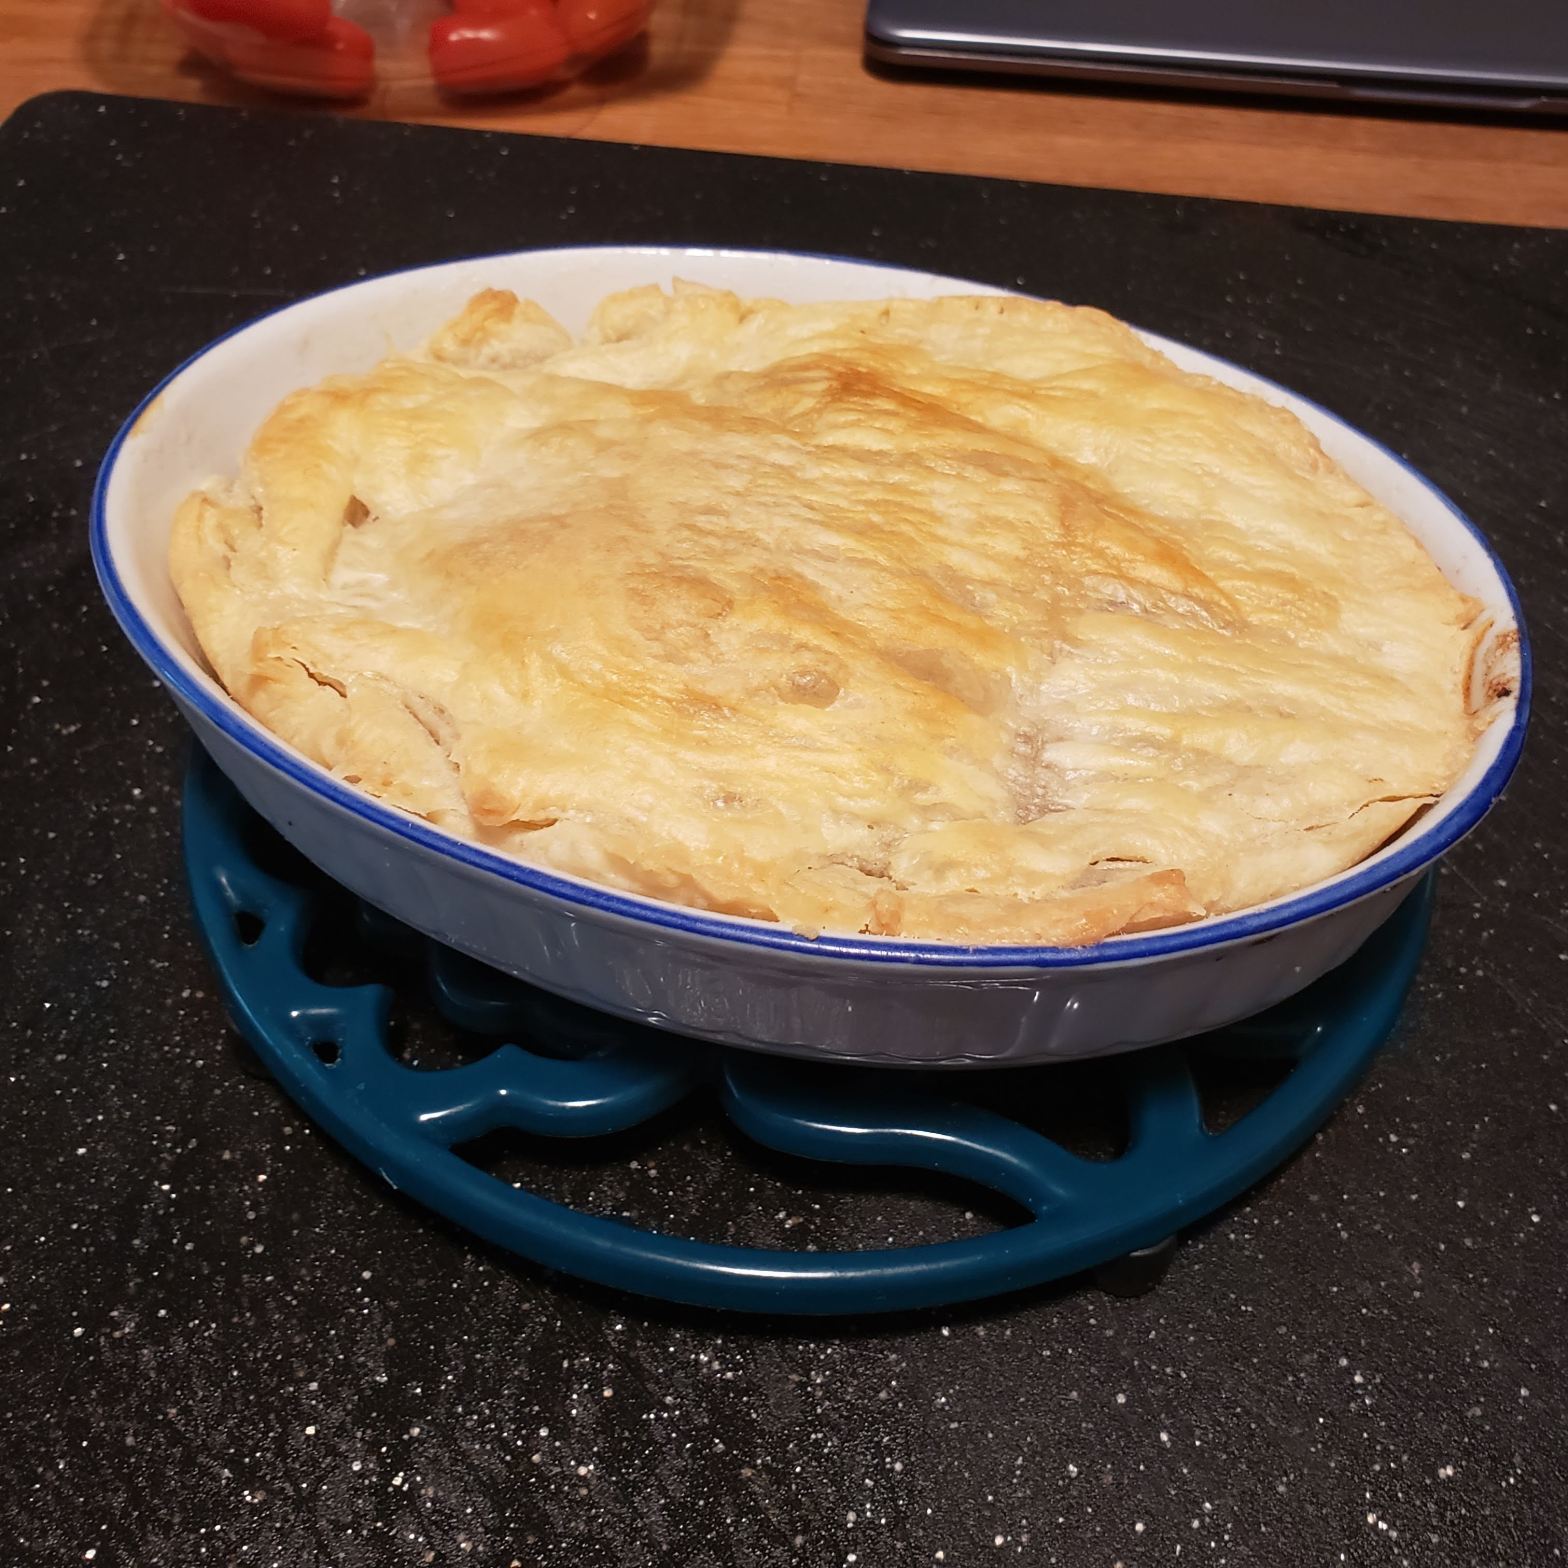
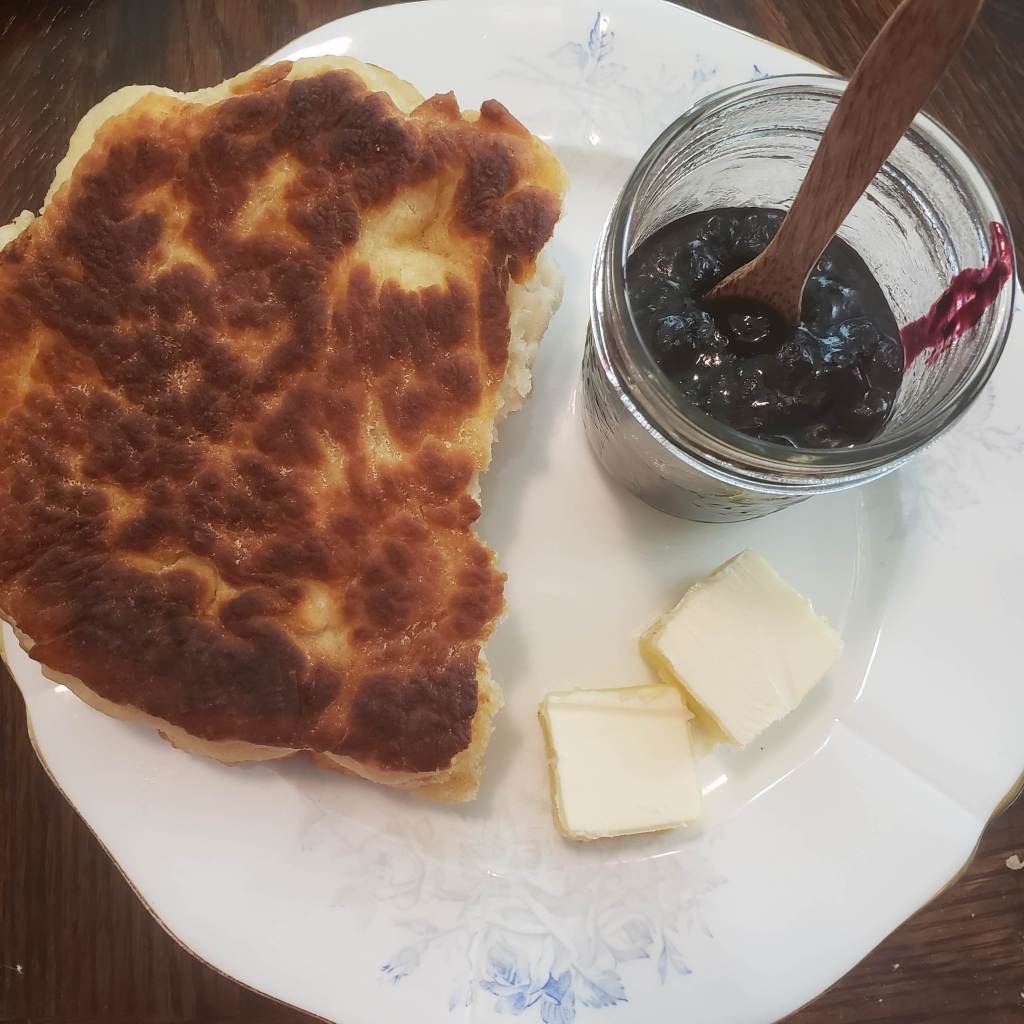
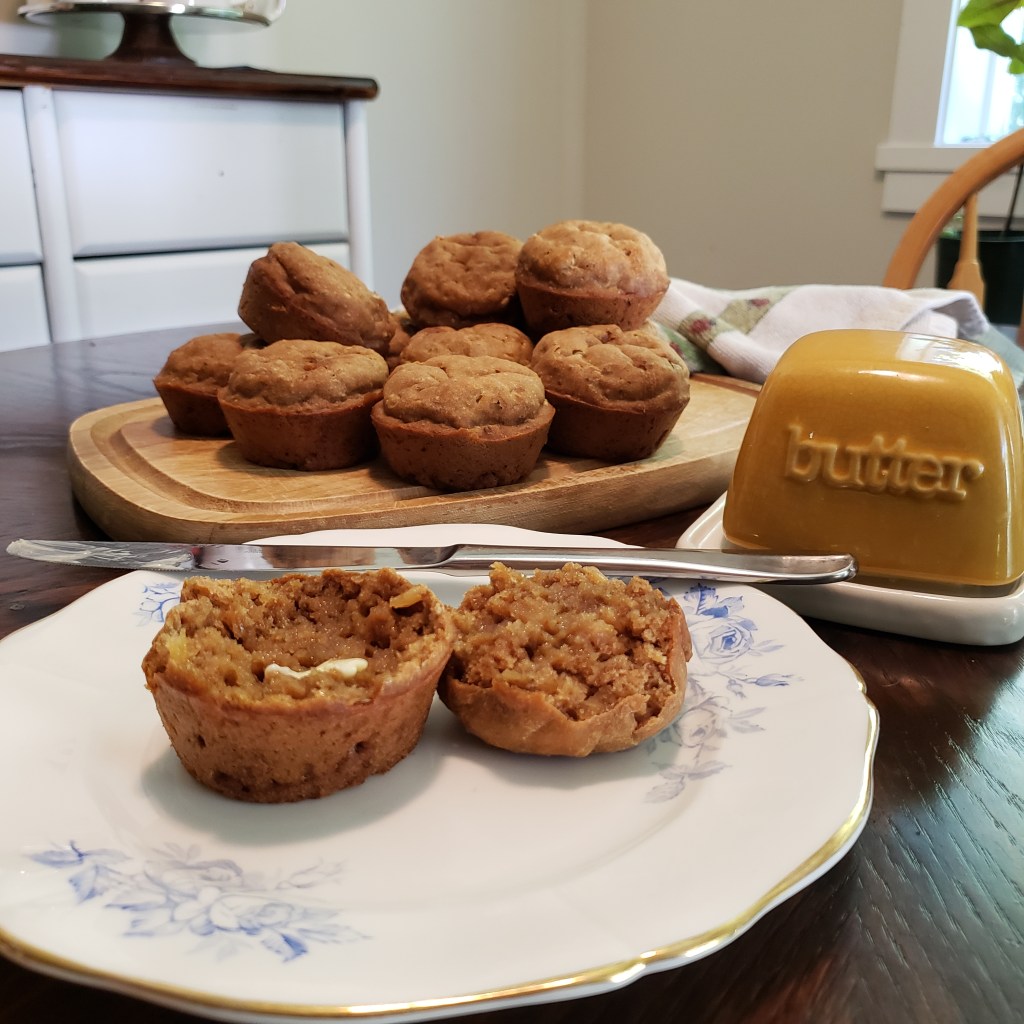
A Delicious Treat
The end result was a delicious and filling snack of dense, slightly salty bread with a fresh tasting, warm sweet sauce. I also served it with butter and it was a big hit in our house. I think I will actually experiment with more recipes like this. I’ve recently been looking into my Ancestry, and I came across a number of Scottish bannock recipes that I think would be fun to try.
Pro-Tip: Make sure you are using a spoon you don’t mind staining!
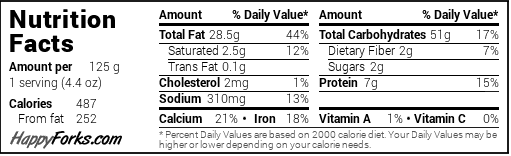
Note: I did end up adding about 1/2 cup of vegetable oil into the nutrition facts as much of the oil I used was absorbed.
At the beginning of 2019, Health Canada released its new dietary suggestions with a revised Canada Food Guide. This guide is different than previous versions with greater emphasis on conscious eating and mindfulness, plant-based options, and getting back to cooking whole foods in the kitchen.
Today I tried out a recipe from the Health Canada website which is full of great meal ideas and suggestions for healthy eating.
We are big breakfast lovers around here, especially on weekends when I have time to make something extra special. I have to say, these turned out to be some of the tastiest pancakes I have ever made! Keep reading to see how simple this tasty recipe is!
Strawberry Pancakes
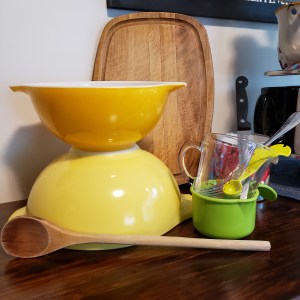
Equipment
Two mixing bowls – small and medium
Cutting board
Knife
Griddle ( I used a skillet, pictured further down)
Spatula (not pictured)
Whisk (Or use a fork and a wooden spoon like me)
Measuring cups for dry and liquid ingredients
Measuring spoons
Ingredients
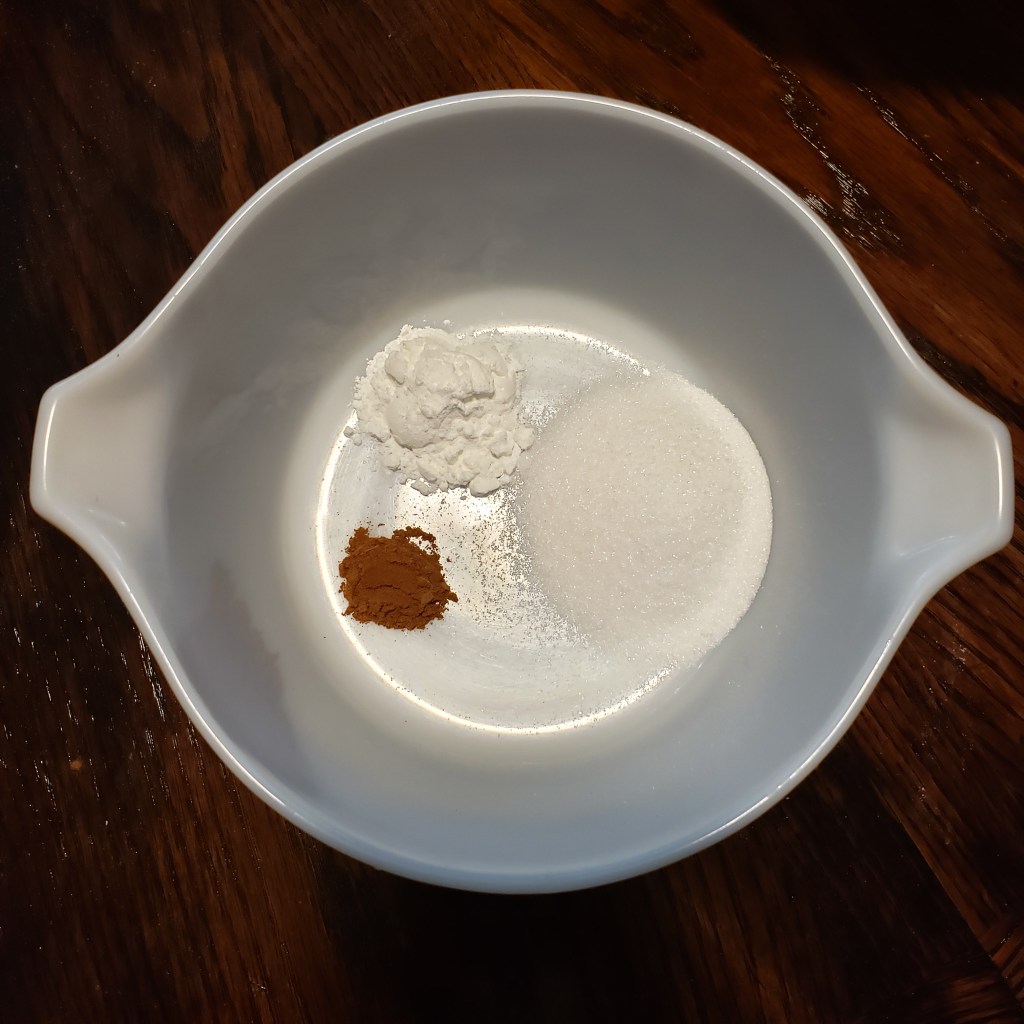
Baking powder, cinnamon, white sugar
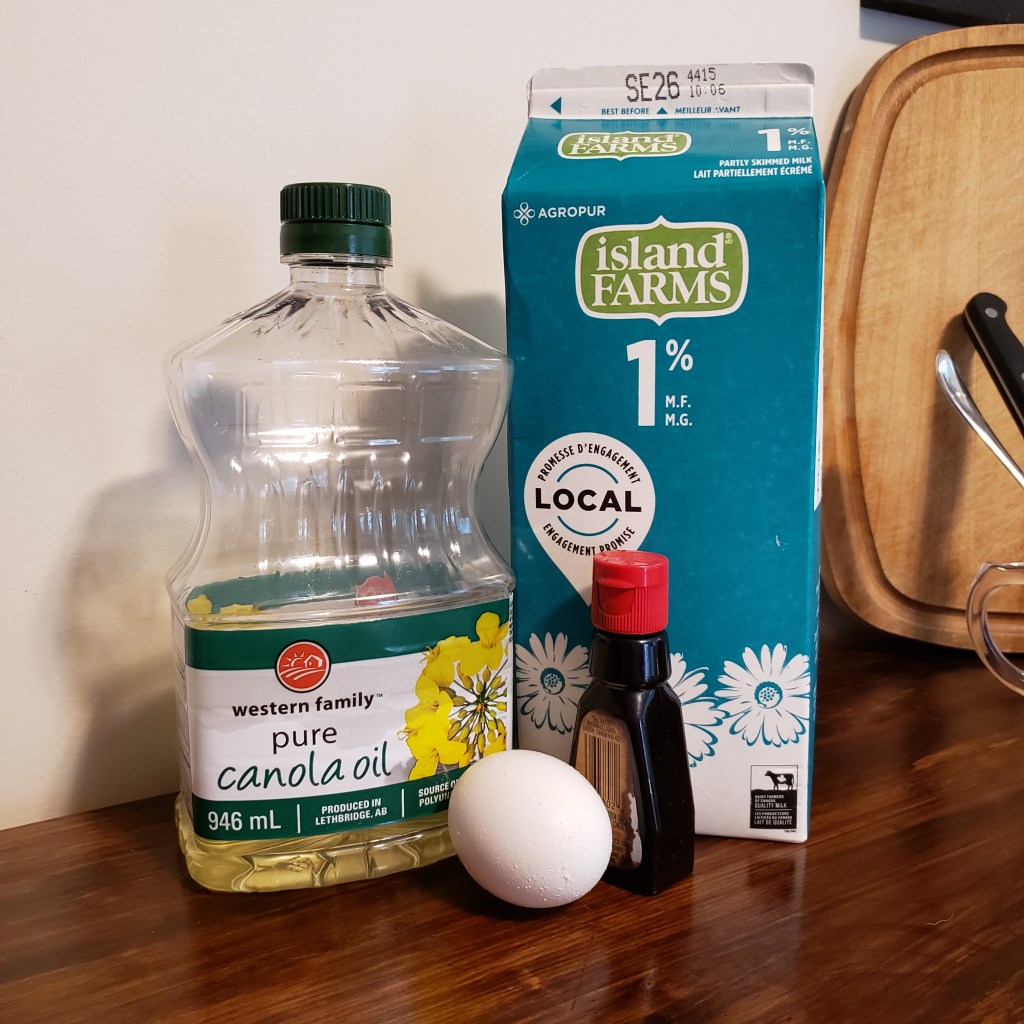
Oil, milk, egg, vanilla
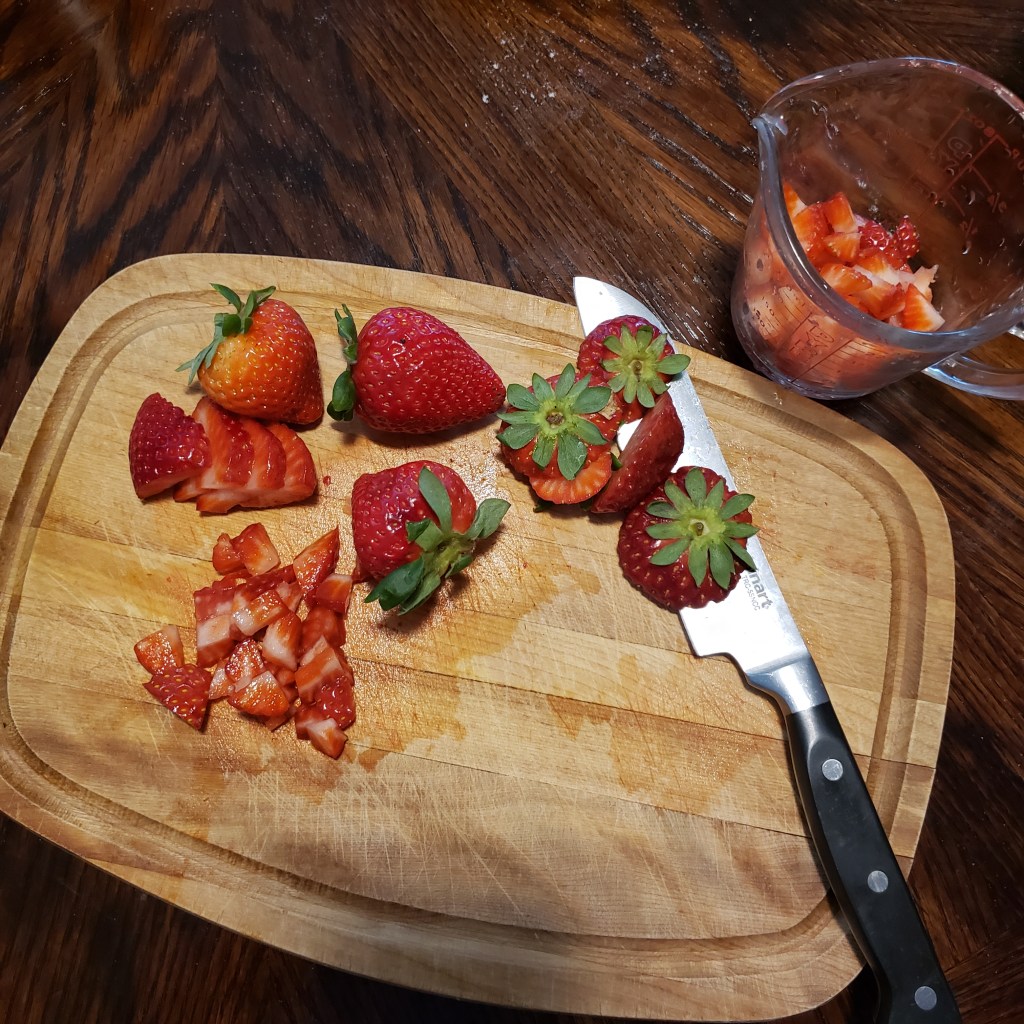
Diced fresh strawberries
Whole wheat flour, white flour
1 cup whole wheat flour
1/2 cup white flour
2T white sugar
2 t baking powder
“Pinch” of cinnamon (I used about 1/2 heaping teaspoon – we like cinnamon!)
1 1/2 c skim milk (I used 1% as that is what we had on hand)
1 egg (mine was a large size)
2 T canola oil
2 t vanilla
1 cup diced strawberries
Method
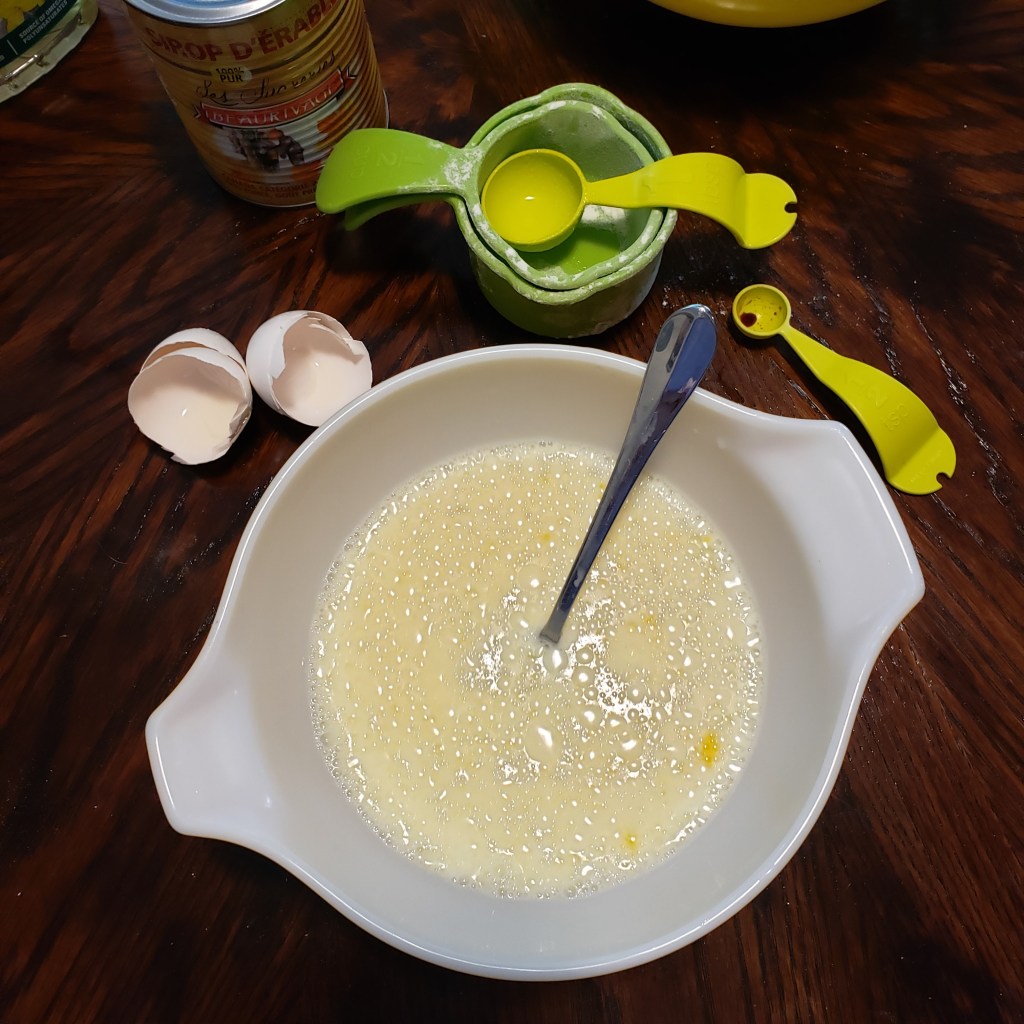
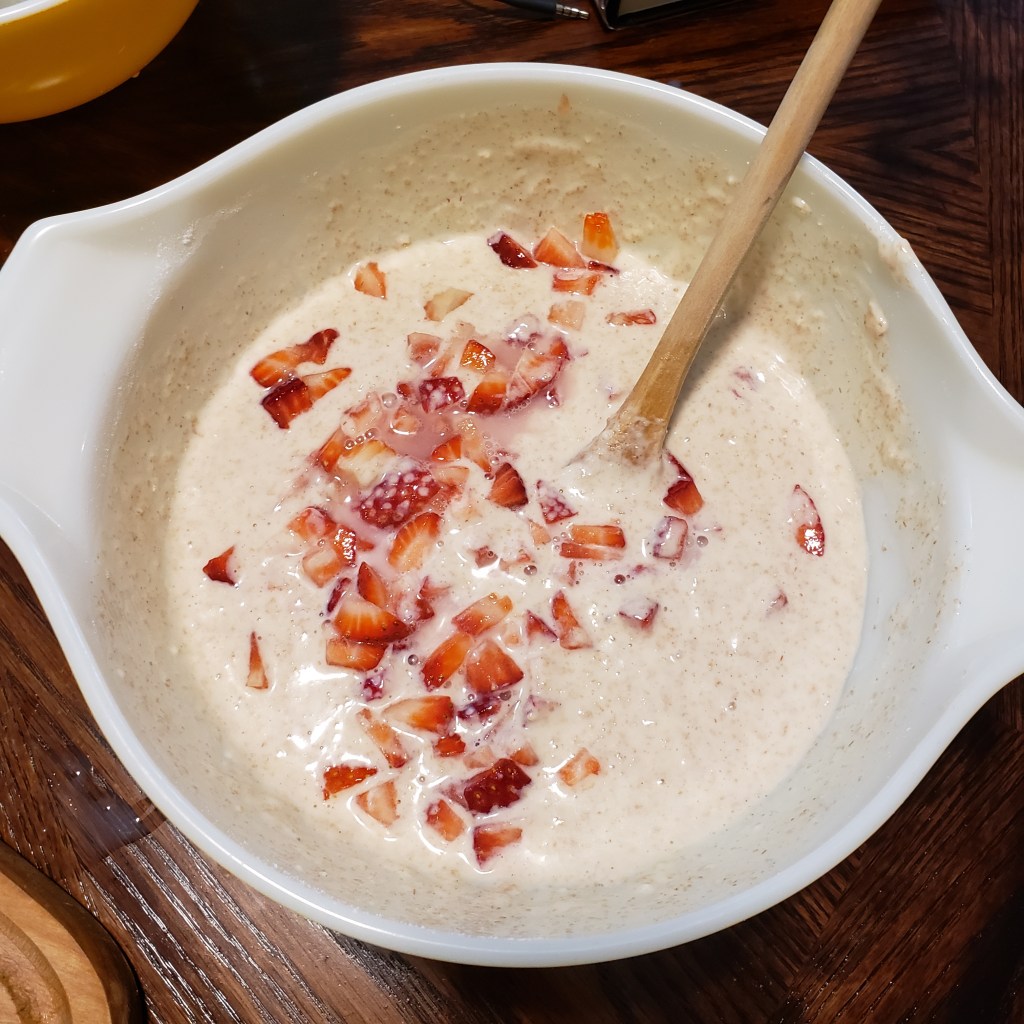
To begin, I mixed my dry ingredients in a medium sized mixing bowl. This included both flours, baking powder, sugar and cinnamon. I used a wooden spoon because I don’t have a whisk although that is what the recipe suggested.
2. In a small mixing bowl, I then blended the wet ingredients together which included the milk, egg, oil and vanilla. I used a fork to whisk it all and get things nice and fluffy.
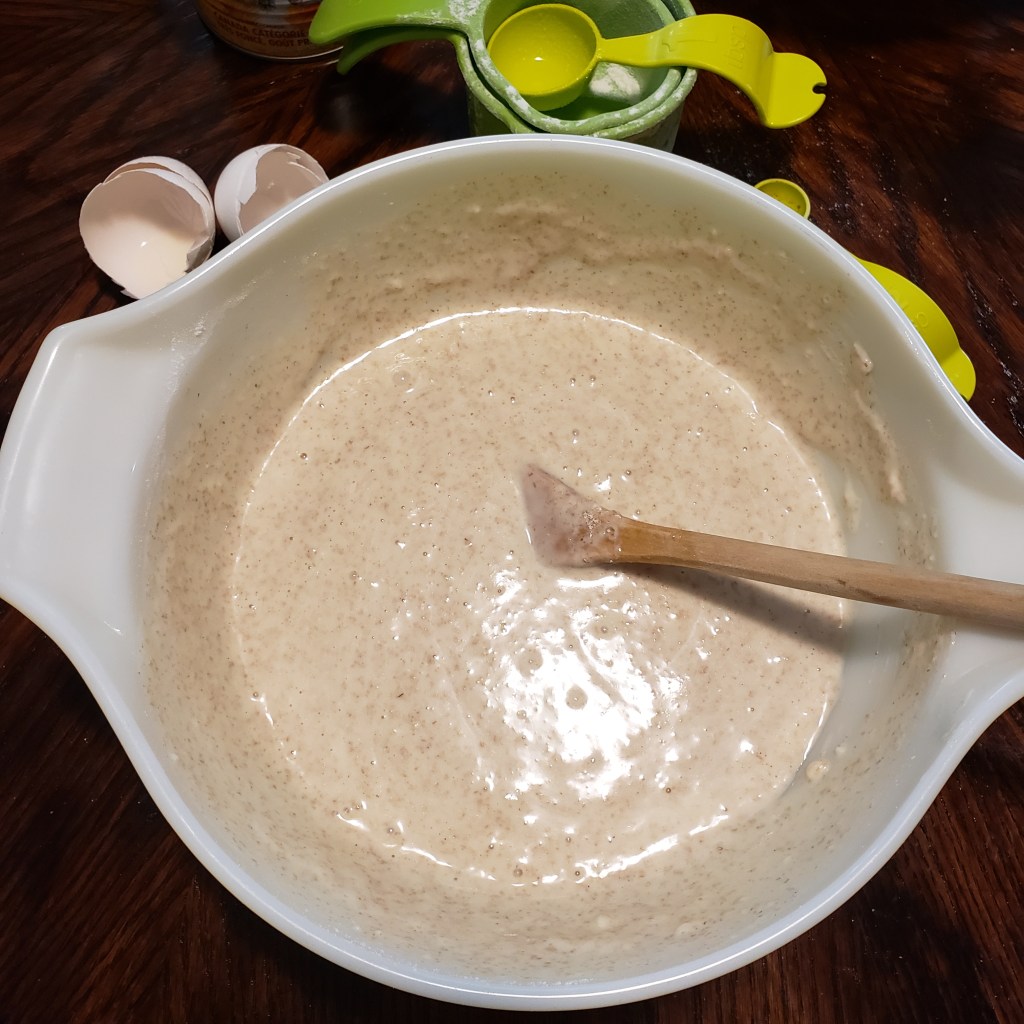
3. Then I incorporated the two mixtures together by adding the liquid ingredients to the dry ingredients and stirred to combine using a wooden spoon.
4. Next, I added my diced strawberries. I diced them fairly small so every pancake had a little taste.
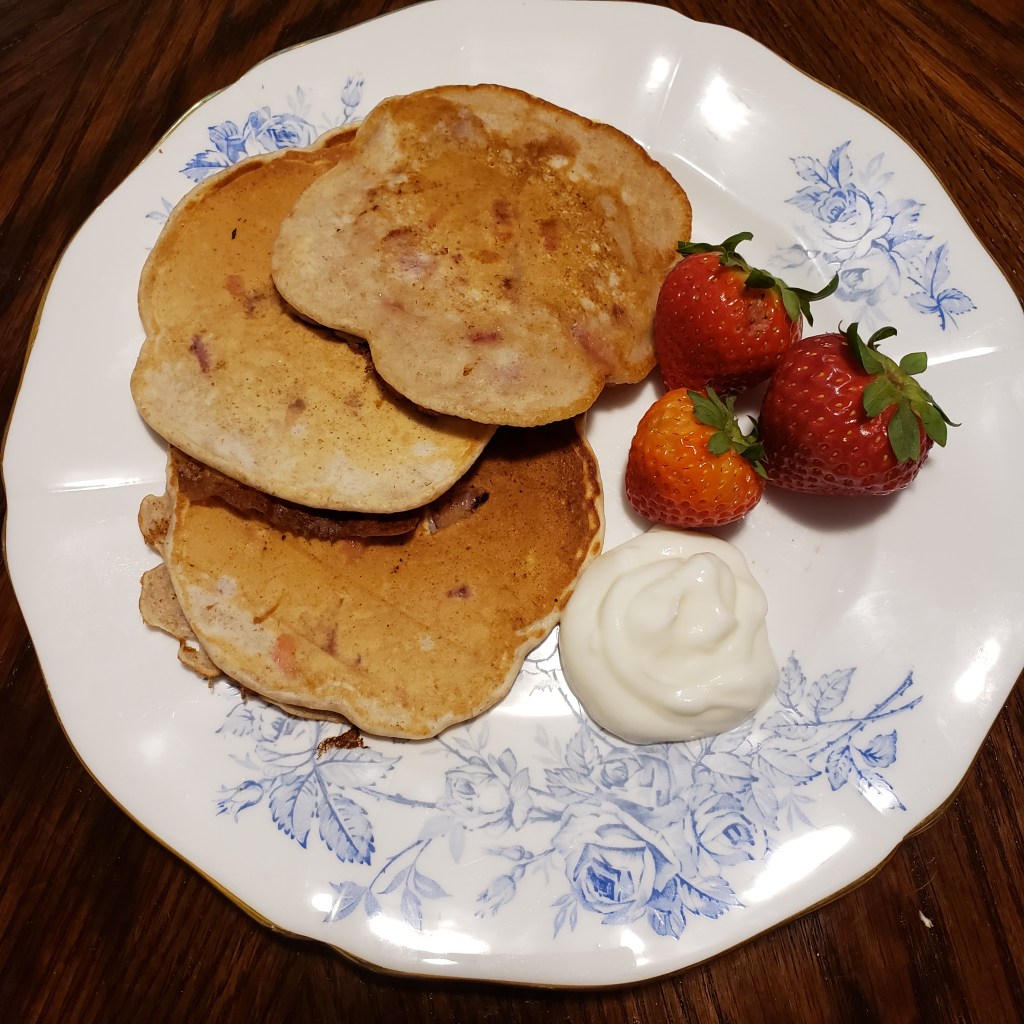
4. Using approximately 1/3 c of batter per pancake (because we like slightly larger pancakes than what was suggested), I cooked them for approximately 2 minutes on each side and repeated this until all my batter was used.
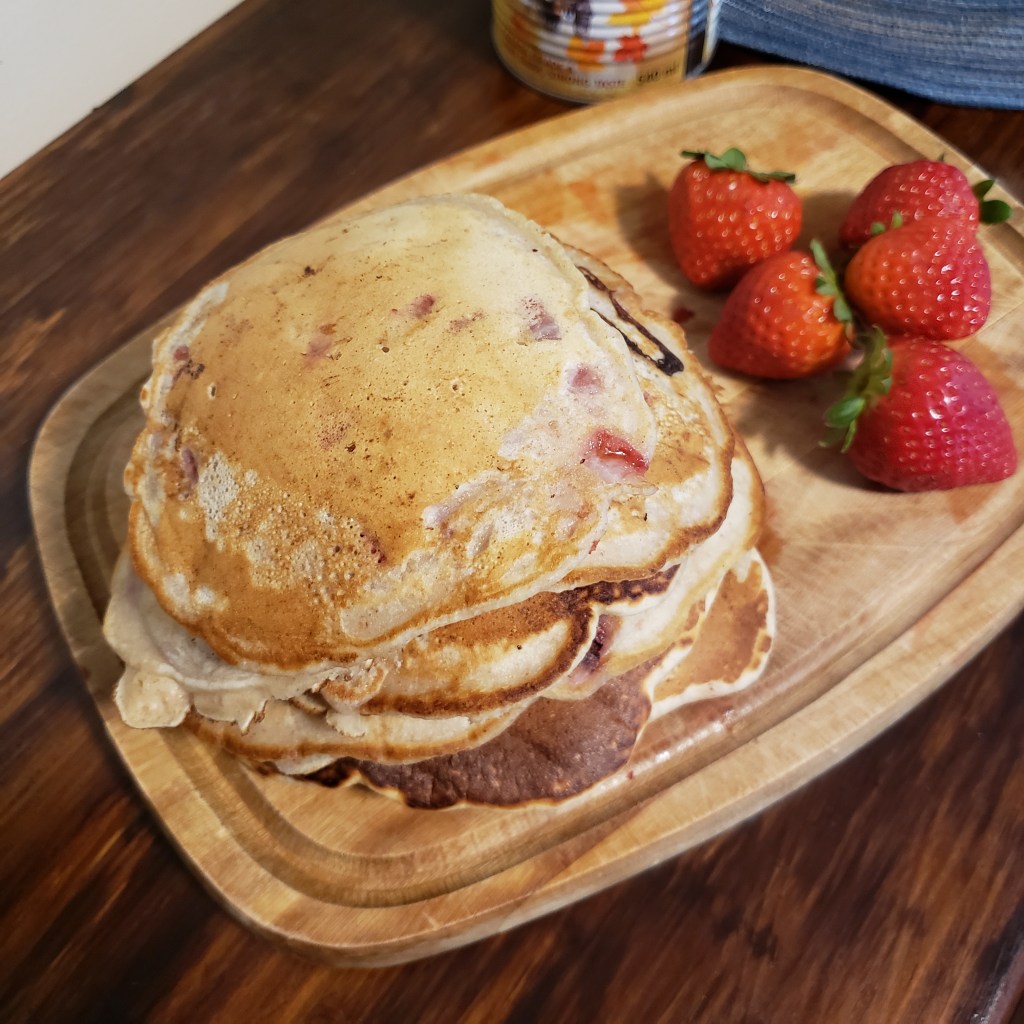
In the end, I was left with a delicious little stack of 10 pancakes that were a bit hit with everyone in my house. I appreciated that the use of whole wheat flour was a simple swap for using only white flour that upped the nutritional value but kept it tasting great.
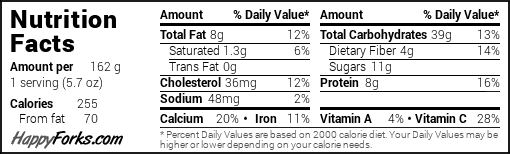
This recipe follows the new guidelines by incorporating whole wheat flours which reduces some of the highly processed white flour you might otherwise use alone. Also, it is salt-free, full of fruit and low in added sugar and fat, with just 2 T oil and low-fat milk. In fact, I think you could easily do with even less sugar because the amount of fruit in this recipe already makes it somewhat sweet.
I regret not taking a picture of the finished product plated using the healthy plate guidelines – I ended up snapping a picture of what I served my boyfriend. Serving myself using the guidelines from Health Canada, I would probably have two pancakes, 1/2 cup low fat yogurt and fill the rest of my plate with some nice fresh fruit.
As a personal suggestion, if you are trying to reduce sugar but you can’t have pancakes without a maple syrupy taste, try mixing a tablespoon of pure maple syrup in one cup of low-fat plain yogurt and use it as a dip. It’s a nice hint of the flavour but keeps your sugar intake nice and low.
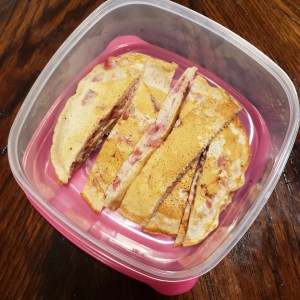
My daughter is also looking forward to having some of these in her lunch tomorrow 🙂
In my experiences with baking, I’ve run into more than a few occasions where I’ve realized a little too late that I’m missing an ingredient. Today was one of those days. It happened to coincide perfectly with this assignment though, since I decided not to take that extra trip to the store and create a muffin recipe using what I had on hand.
My Alterations
I wasn’t just out of one ingredient today, I was out of a few. Specifically sugar, oil and eggs. I’ve baked without eggs before, regularly scant my sugar and have used mashed banana to substitute oil many a time, but never have I tried to substitute all three.
Beginning with sugar, I decided I would use liquid sweeteners in the form of honey and juice which I hoped would add additional flavour.
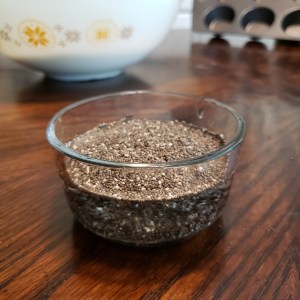
For eggs, I substituted my favourite vegan baking substitute – 1 T of chia seeds mixed with 1/4 cup of water. I used two chia “eggs” for this particular recipe.
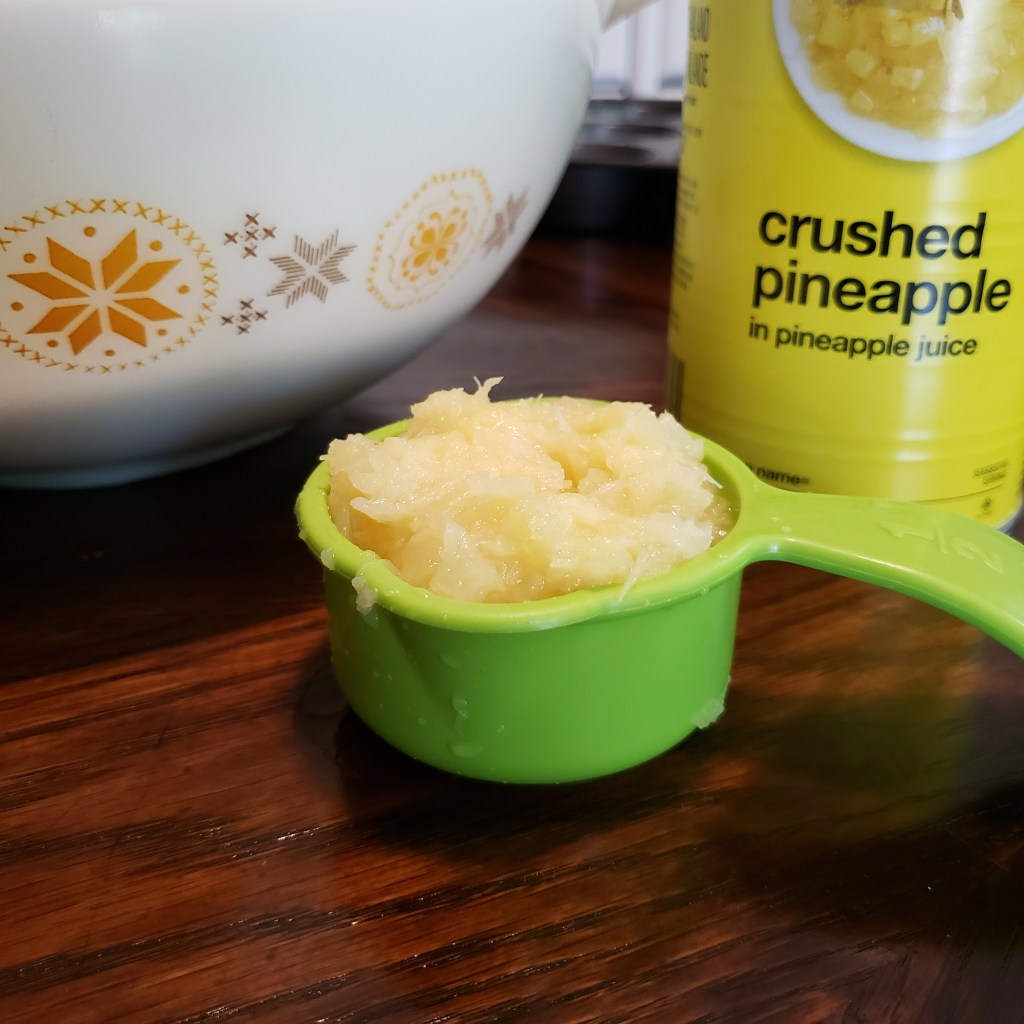
Oil was my biggest concern. As I mentioned above, I have substituted mashed banana numerous times, but today I didn’t have any of those either. I decided to try crushed canned pineapple and use the juice from it as part of my liquid component.
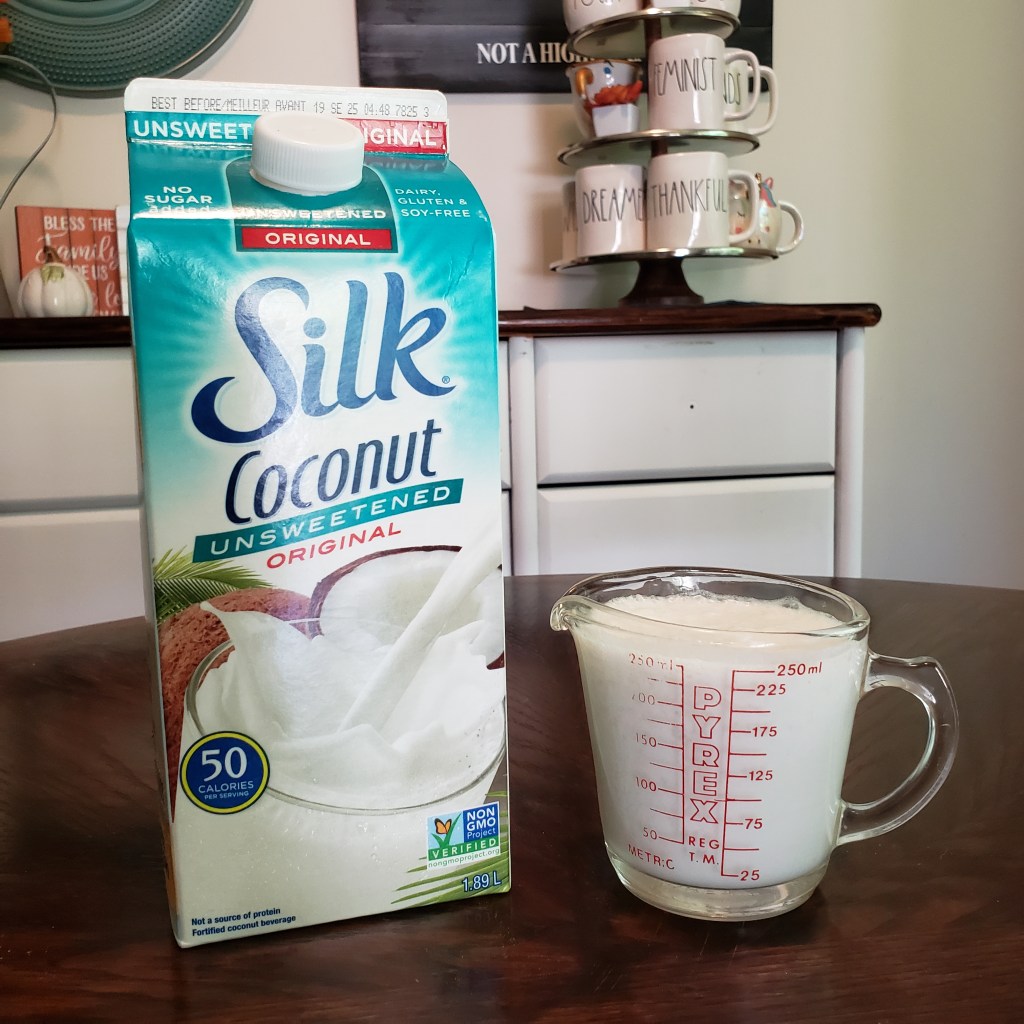
Because I was using pineapple, I also used Silke Coconut Milk in place of regular dairy milk because I thought it would be a complimentary flavour.
I decided to replace the sugar from the original recipe with additional flour because I was concerned that removing that much dry ingredient would effect the consistency. I also increased the liquid amount since my pineapple substitute meant less liquidy volume. I did not change baking powder amounts because that is something I don’t have much experience experimenting with.
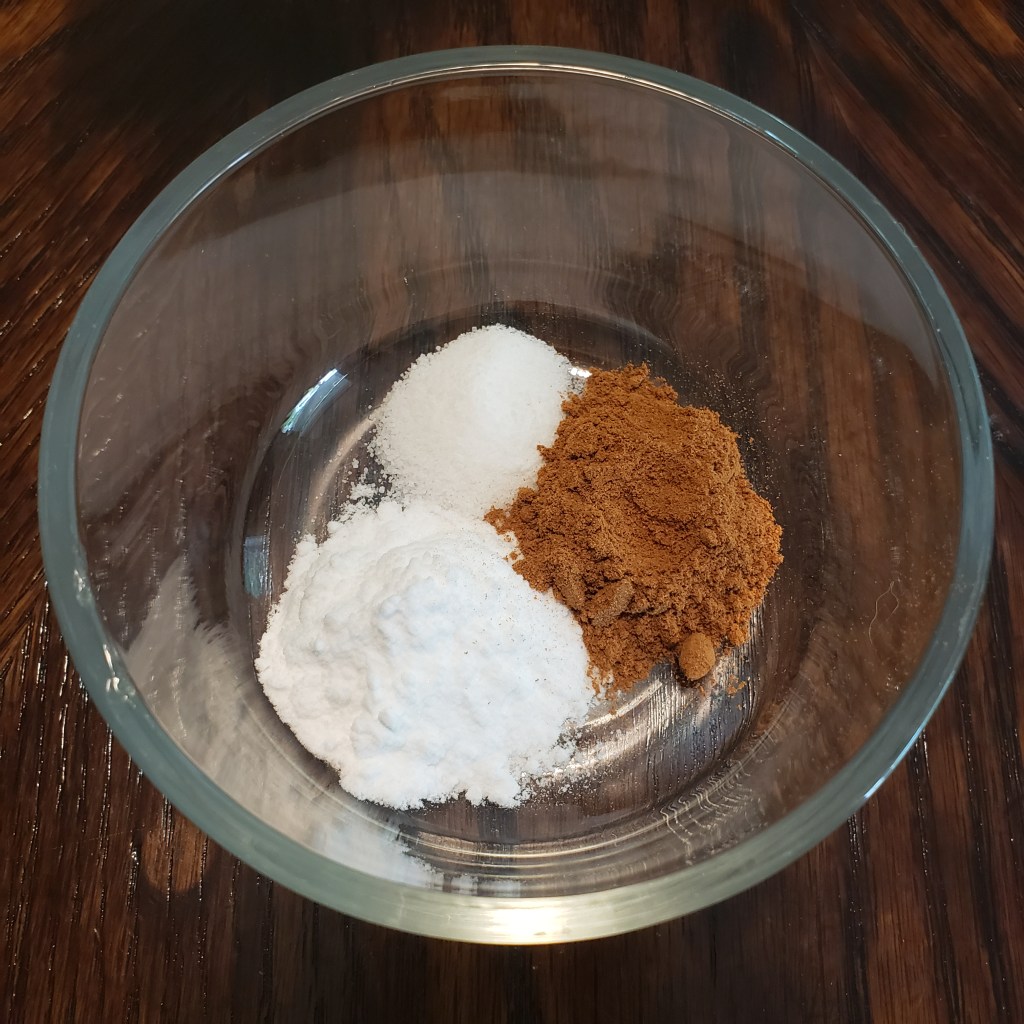
Dry Ingredients:
2 1/2 cups white flour
1 T baking powder
1/2 t salt
1 t cinnamon
Liquid Ingredients:
2 T chia seeds mixed with 1/2 cup water. Let stand ten minutes until it has a thin gel-like consistency.
1 cup Silk Coconut Milk
3/4 cup pineapple juice squeezed from a can of crushed pineapple
1/2 cup crushed canned pineapple
1/4 cup liquid honey
Equipment:
Large and medium mixing bowls
Measuring cups and spoons
Wooden mixing spoon
Muffin tin
Liquid measuring cups
Can opener
Pam spray or cupcake liners
Equipment
Method
To begin, preheat your oven to 350’F.
Create two chia “eggs” by mixing 2T of chia seeds with 1/2 cup of water. Set aside ten minutes until the water has a thin gel-like consistency.
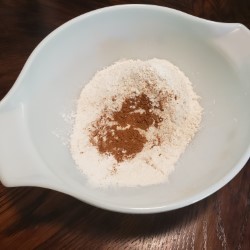
In large mixing bowl, mix together the dry ingredients and set aside.
Baking powder, salt, cinnamon
Mix together in the larger mixing bowl with flour
Next, press 3/4 cup of pineapple juice from the can of crushed pineapple using the back of a wooden spoon.
In the small mixing bowl, combine the juice with the other liquid ingredients – this includes the Silk Coconut Milk, crushed pineapple, liquid honey, and the chia “eggs”.
All mixed up!
Line a muffin pan with cupcake liners or spray with Pam.
Next, pour the liquid ingredients into the dry ingredients that you set aside and mix together thoroughly.
Once mixed, spoon batter into the prepared muffin pan. I was able to use all the batter to make exactly one dozen muffins (which I loved, because I hate having to put in another batch of just a couple muffins so I don’t waste leftover batter).
Let bake in oven for 30 minutes.
The Finished Product
Well, some things work out and some things don’t. I would put this recipe right in the middle. It’s pretty tasty, mildly sweet, has a nice pineapple flavour, but the texture didn’t cut it for me. I was hoping for a muffin with a nice crumbly texture but this turned out too moist and chewy.
I would like to try this recipe again but more closely follow the original dry goods to liquids ratio. I also plan on doing just one substitution at a time so I can isolate where I went wrong. Overall this was a really fun experiment and lesson!
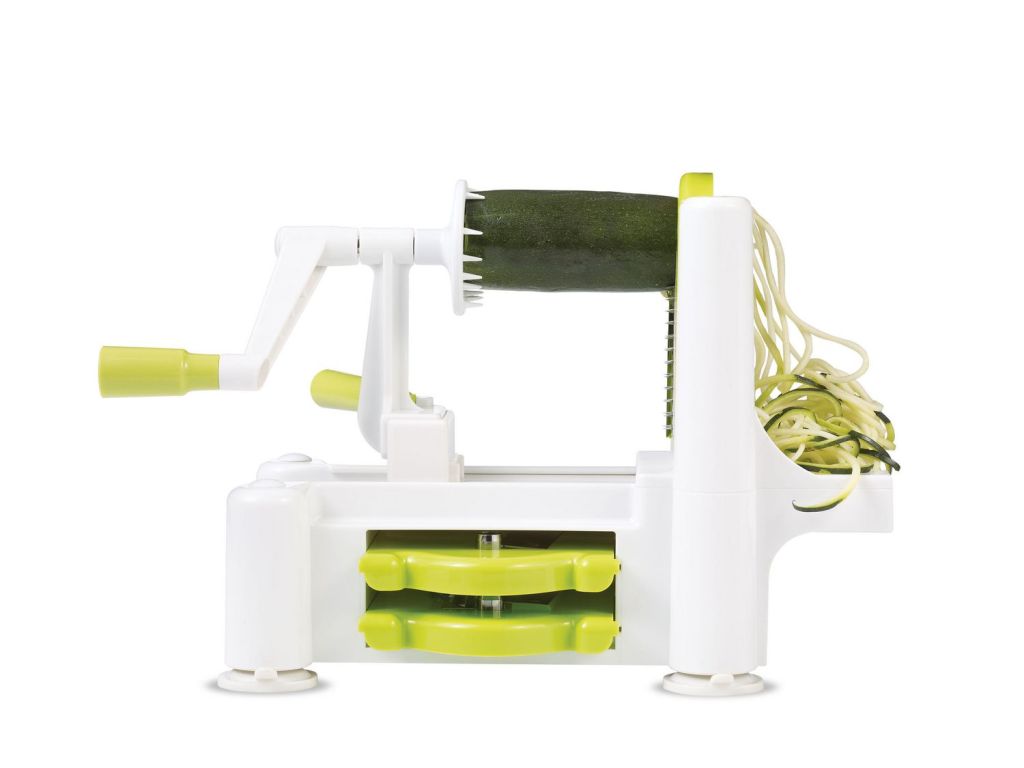
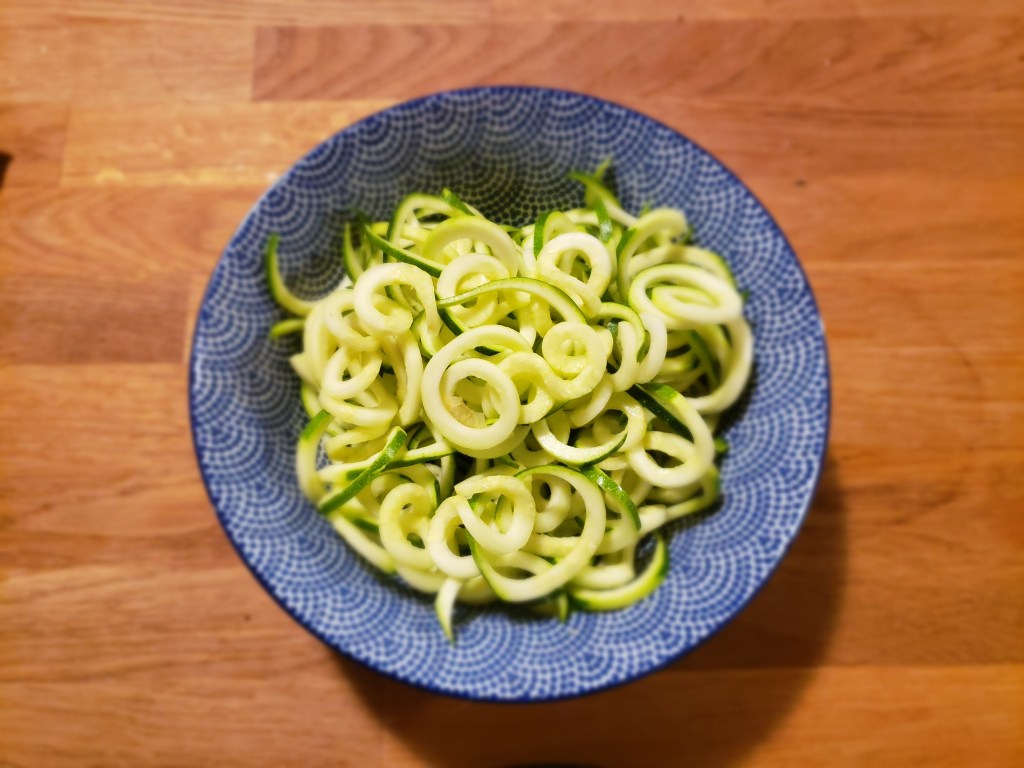
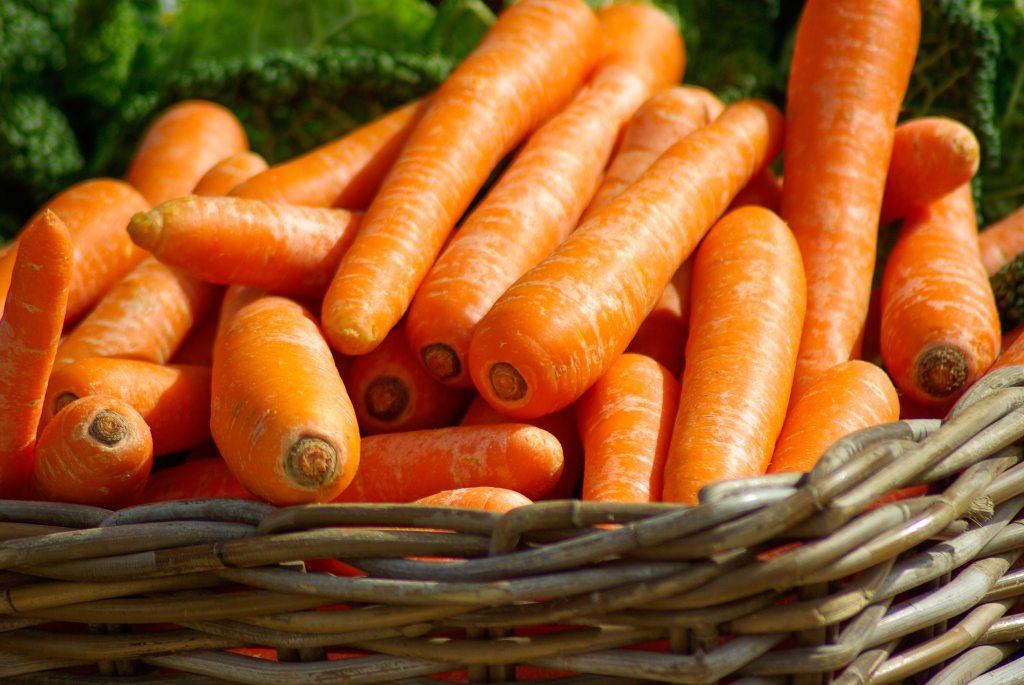
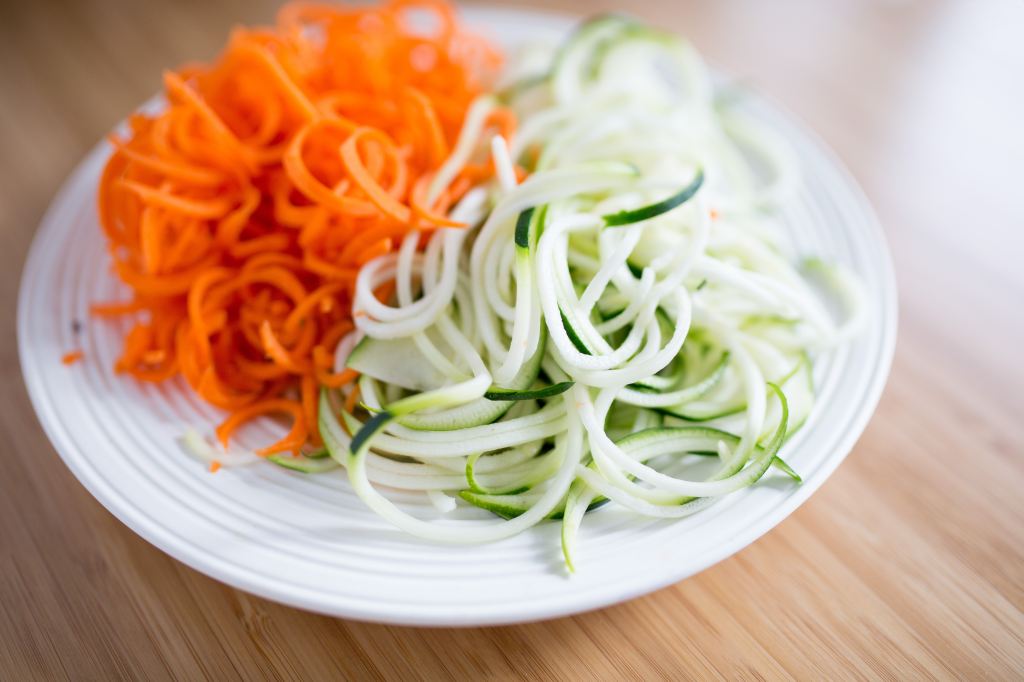
The Starfrit Spiralizer was a really fun product to use. Although I’m not one to use a lot of gadgets in my kitchen or follow food trends, I really enjoyed the end result of my spiralized produce. The product is lightweight (under 2 lbs) and takes up about as much space on your counter as a basic toaster. It measures in at 12″ x 6″. It is very simple to assemble and disassemble which made for very easy clean-up. It consists of three interchangeable blades for different cutting shapes (slices plus thin and thick spirals), a base that holds the blade while cutting and also provides storage and a handle that slides the produce forward towards the blade. In my experience all the parts slid in and out easily and fit together well. I have tried zucchinis, apples and carrots and all worked very easily in this product. The average cost of this product is $25 and is available locally at both Canadian Tire and Walmart and also on Amazon.
On the Pro Side The first thing I realized after using this product was that slicing and spiralizing are two functions of my noisy and cumbersome food processor that I dread hauling out of the back of my cupboard. The fact that this product is lightweight and compact is a huge bonus for me. I also appreciated how easy it is to take apart. Unlike other models or electric versions, there are no small parts or compartments. You can ensure that this product gets very clean and doesn’t leave any hidden messes. Lastly, I love how this is an easy way to make vegetables and fruits more appealing to picky eaters. Sometimes variety is key and finding a new way to serve veggies is definitely something I consider a plus.
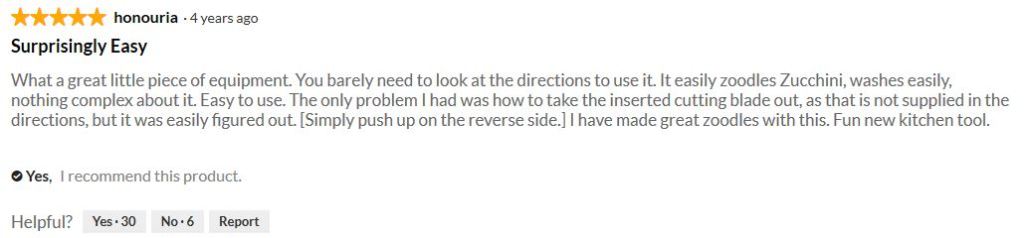
On the Con Side My immediate reaction when I picked up this item was noticing just how lightweight it is. Constructed almost entirely of plastic except for the slicing blades, this is one tumble off a countertop away from breaking. On top of rather flimsy construction, the design itself leaves a lot to be desired. Namely the fact that the suction cups did not stay attached to my wooden worksurface. This meant that I was forced to press down on one side to keep it in place but that made the product tip right over or made my hand slip off towards the blade or right into the food.
Will I Use This Again? Overall, I liked the ease of use and the unique options I can create with this product. But do I consider it a staple gadget in my kitchen? No. I’m somewhat of a traditionalist and I don’t like losing cupboard space to unnecessary items. If I add an appliance, it had better serve an essential purpose. This product spiralizes and slices vegetables my but my vegetable peeler makes lovely zucchini ribbons and my knives already slice and I consider both of those items essential already so for me it isn’t worth the loss of space. I think this could be valuable if you are a person who consumes a large amount of vegetables, or require low carbohydrate alternatives to pasta. With its reasonable pricepoint, this could be very useful for some people, but it isn’t for me.
I loved the fun way to serve fruits and veggies but the flimsy construction put me off. I give this product 🥗🥗🥗/🥗🥗🥗🥗🥗 Photo from pexels.com
For the longest time, I have collected old cookbooks. It started with a love of my mum’s old copy of “Joy of Cooking”. It’s pages were stained and dog-eared, and contained little notes in the margins of improvements she made, or shortcuts she’d discovered. I wanted to borrow it to take to my first apartment so I too could practice the recipes but my mum wouldn’t let it out of the house. So the first Christmas on my own, I was given my own copy. Except it wasn’t really the same. It was brand new, sturdy, and there were no notes to guide me. Since then, I’ve developed an impressive collection of cookbooks – almost all of them old, bought second-hand, with cuttings of old newspapers tucked within the pages, and hand-written notes from women I’ve never met, but who clearly put love and time into their efforts, wanting to make things “just right”. I flip through them not just to find cooking inspiration but because to me, food is all about connection. It connects us to the past, of what life was like when our grandmothers were young or when our country went through times of scarcity. Food helps us connect with others, it transforms times of difficulty into something more comfortable and bearable, and it is something we can provide to others to show our love. Now as a mother, I love connecting with my daughter in the kitchen, hoping that my efforts create memories for her that will someday draw her back to a place of love and learning and comfort.